Mirantis OpenStack 7.0 - LDAP Fuel Plugin
In the Enterprise world, user authenticates over an Lightweight Directory Access Protocol (LDAP) most of the time. Openstack Keystone, the identity service, integrates natively with LDAP directories for authentication and authorization services. The configuration of Keystone can be automated using Mirantis LDAP Fuel Plugin.
This article is a step by step guide to integrate Keystone to OpenLDAP but any other LDAP directory including Active Directory could do a perfect job too.
Keystone domains
The Fuel LDAP Plugin is using the concept of Keystone Domains and put domain specific configuration in
/etc/keystone/domains/keystone.<domain>.conf
Mirantis OpenStack will still be using MySQL for admin and services OpenStack users while cloud consumers can just be added to the LDAP directory.
The following parameters are required to setup Keystone connectivity to LDAP
- url - URL for connecting to the LDAP server
- user - BindDN to query the LDAP server
- password - Password for the BindDN to quesry the LDAP server
- suffix - LDAP Server suffix
- user_tree_dn - Search base for users
The Fuel LDAP plugin will then automatically configure Keystone from the argument provided in the Fuel Web UI, for example here is the end result of my configuration file
#/etc/keystone/domains/keystone.bulb.int.conf
[ldap]
suffix=cn=bulb,cn=int
user_allow_update=False
user_pass_attribute=userPassword
url=ldap://192.168.1.254:389
user_allow_create=False
user=cn=Manager,dc=bulb,dc=int
user_objectclass=inetOrgPerson
user_id_attribute=cn
query_scope=one
password=mypass
user_allow_delete=False
user_name_attribute=sn
user_enabled_attribute=enabled
user_filter=
user_tree_dn=ou=Users,dc=bulb,dc=int

[identity]
driver=keystone.identity.backends.ldap.Identity
Note that it is recommended that the assignment information (roles, projects, domains) be kept separate from the identity information (users, groups), so this is exactly what the plugin is doing. He will keep all the OpenStack service accounts and assignement information within the default MySQL database backend and will leverage the directory for user/password information.
Now let see how to build the plugin from source.
Build Plugin
Mirantis publish Fuel plugins on its catalog page but the LDAP one isn’t available there yet. So we have to build it ourselve from the github repository.
Install required packages on Ubuntu 14.04
# apt-get install createrepo rpm dpkg-dev
Clone the repository
# git clone https://github.com/stackforge/fuel-plugin-ldap
Install the Fuel Plugin Builder
# pip install fuel-plugin-builder
Build the plugin
# fpb --build fuel-plugin-ldap/
# Plugin is built
Plugin Installation
The artefact produced by the builder is an RPM package that needs to be installed on Fuel Master Node
# cd fuel-plugin-ldap
# scp ldap-1.0-1.0.0-1.noarch.rpm root@<FUEL_IP>:/tmp
# ssh root@<FUEL_IP>
# cd /tmp
Install the plugin
# fuel plugins --install ldap-1.0-1.0.0-1.noarch.rpm
You should see the following message
Plugin ldap-1.0-1.0.0-1.noarch.rpm was successfully installed.
You can check the plugin was correctly installed
# fuel plugins --list
id | name | version | package_version
---|------|---------|----------------
1  | ldap | 1.0.0   | 2.0.0
OpenStack Environment and LDAP Plugin Configuration
Now that you have the plugin installed, you can create a new OpenStack environment from Fuel Web UI.
I’m not going to repeat myself, by describing here the workflow to create and configure a Mirantis OpenStack envinronment, please consult a previous article which will guide you thru that process.
Once your environment is created, reach the Settings tab and click in the left column on LDAP Plugin for Keystone
You should input something like this.
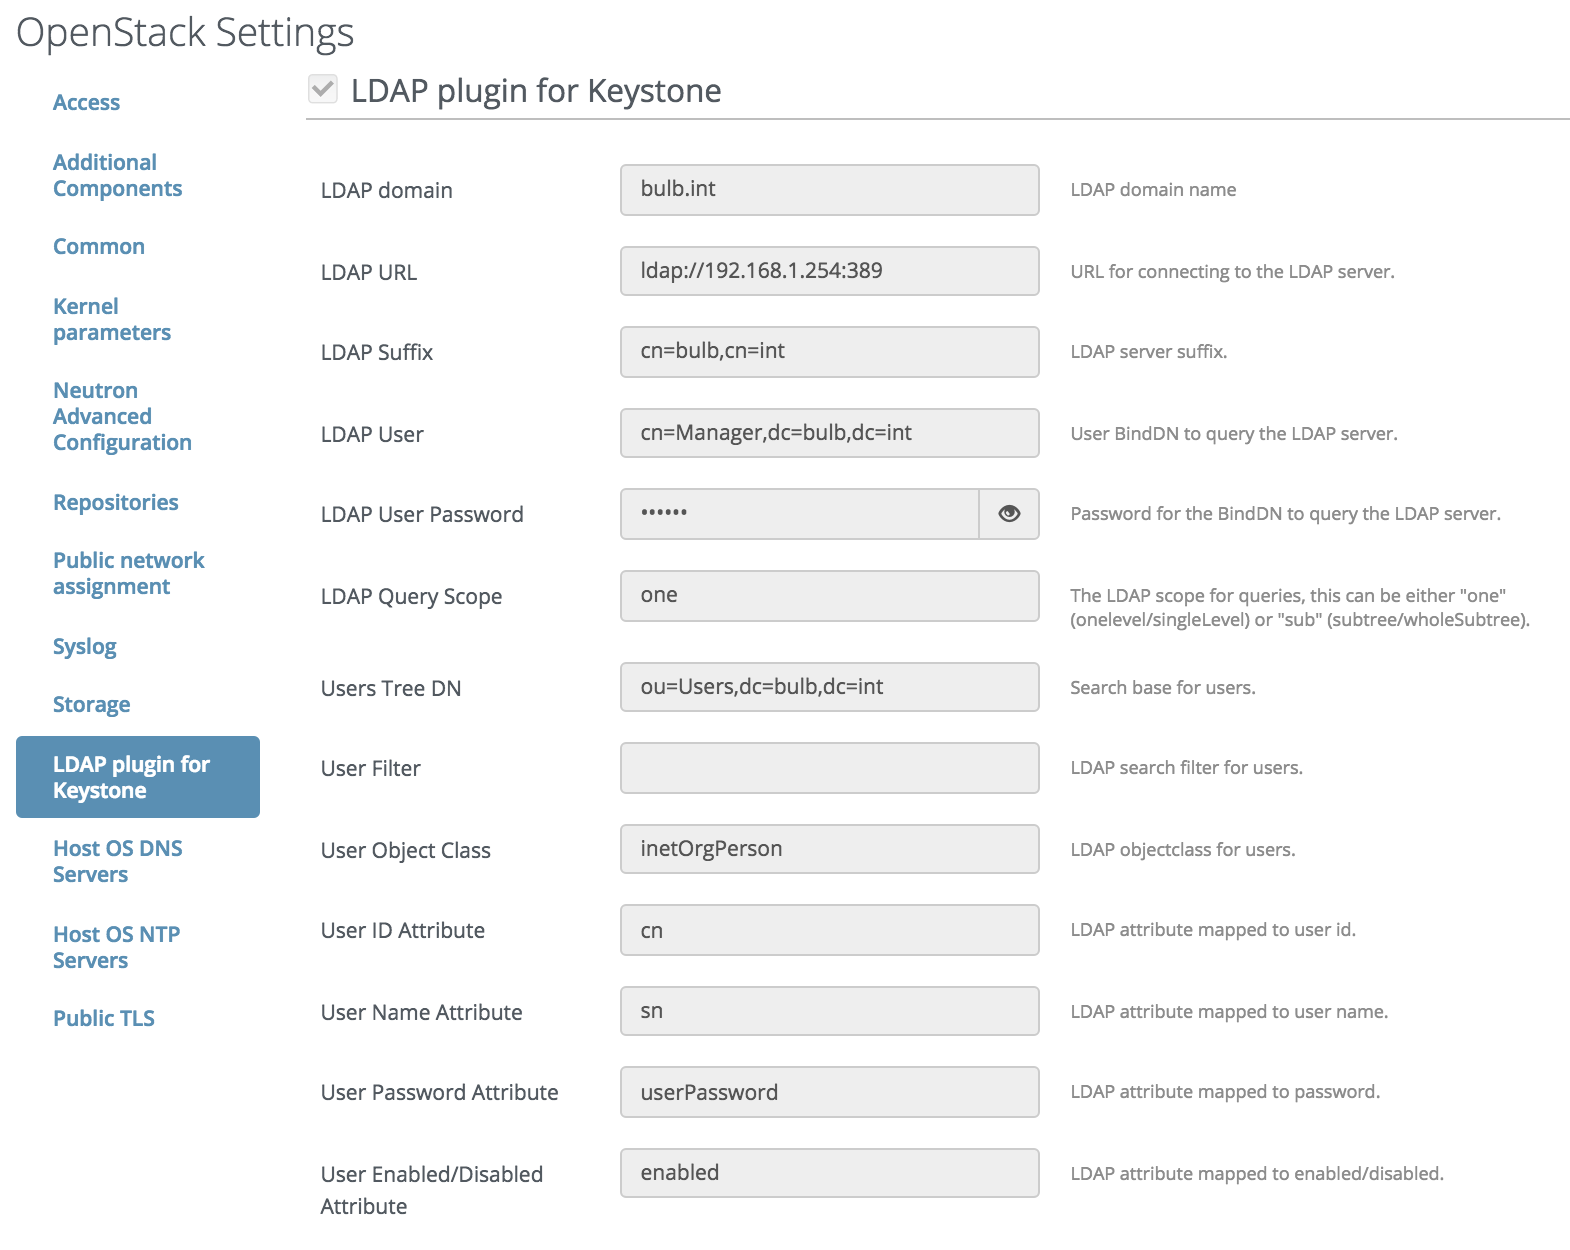
Just replace the IP in the LDAP URL field above by your OpenLDAP server IP address and bulb.int by your domain name everywhere.
If you’ve verified everything, you can deploy your environement and continue on while it’s deploying.
LDAP Server
I’ll now be using Ansible and Bennojoy OpenLDAP role to deploy the LDAP service that will respond to Keystone requests.
ansible-galaxy install bennojoy.openldap_server
This will install the corresponding role below your roles directory.
Make sure you have at least Ansible 1.7 or install or upgrade it, refer to my article on Ansible for an howto.
Now create a Playbook to assign this role to your host with some variables:
- name: Infrastructure Services [LDAP server]
  hosts: dcrouter

  roles:
   - {role: bennojoy.openldap_server,
   openldap_server_domain_name: bulb.int,
   openldap_server_rootpw: mypass,
   openldap_server_enable_ssl: true}
Replace dcrouter above by the hostname that you’ve declared in your /etc/ansible/hosts file, consult Ansible documentation for further details.
Before executing that playbook, to keep things as simple as possible, enable un-encrypted LDAP communication in the roles/bennojoy.openldap_server/files/slapd file by updating the following line
SLAPD_SERVICES="ldap:/// ldaps:/// ldapi:///"
Terminate this process by running the Playbook to configure your node.
# ansible-playbook bulb-dcrouter.yml
On your target node you can check LDAP Configuration
# vi /etc/ldap/slapd.conf
Try to search for some LDAP entries
ldapsearch -x -w mypass -D"cn=Manager,dc=bulb,dc=int" -b "dc=bulb,dc=int" -s sub "(objectclass=*)"

# extended LDIF
#
# LDAPv3
# base <dc=bulb,dc=int> with scope subtree
# filter: objectclass=*
# requesting: ALL
#

# bulb.int
dn: dc=bulb,dc=int
objectClass: domain
dc: bulb

# search result
search: 2
result: 0 Success

# numResponses: 2
# numEntries: 1
Add the following entries by creating file named openstack.ldif with the following content
# vi openstack.ldif

# OrganizationalUnit
dn: ou=Users,dc=bulb,dc=int
objectClass: top
objectClass: organizationalUnit
ou: users

# InetOrgPerson
dn: cn=demo,ou=Users,dc=bulb,dc=int
cn: demo
displayName: demo
givenName: demo
mail: demo@bulb.int
objectClass: inetOrgPerson
objectClass: top
sn: demo
uid: demo
userPassword: mypass
Get these entries into your OpenLDAP
# ldapadd -D 'cn=Manager,dc=bulb,dc=int' -f openstack.ldif -w mypass -x
-w your password
-W use this one over -w if you prefer not to have your password in your bash history
-x to use simple authentication instead of SASL
Check your entries are really there
# slapcat
OpenStack Fuel Deployment
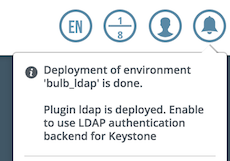
At the very end of the Fuel deployment, the LDAP plugin will be run, as you can see below

After a short time you should get
And
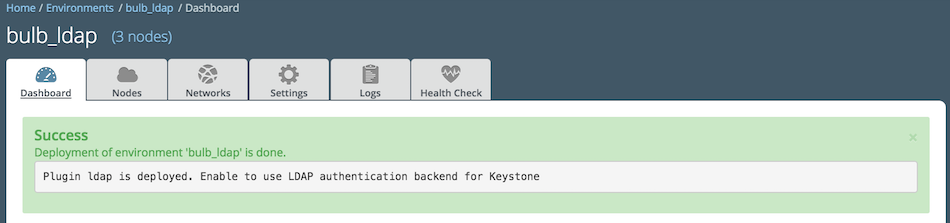
You now have a fully working OpenStack Environment integrated with OpenLDAP, lets check that.
Testing
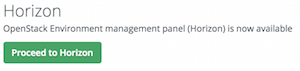
You can now easily access OpenStack Horizon Dashboard by clicking on Dashboard tab and Proceed to Horizon
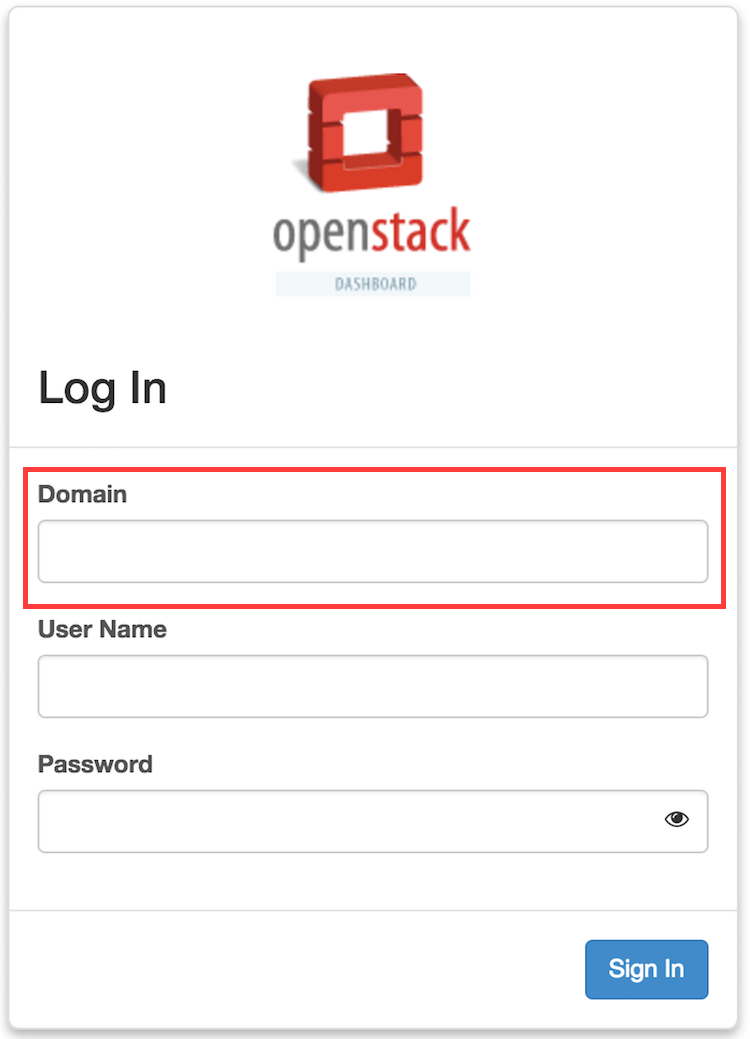
You’ll quickly realise that Horizon Login page has changed, due to the use of Domains.
It is made possible by changing the Horizon configuration to use Keystone API version 3 in its config file
/usr/share/openstack-dashboard/openstack_dashboard/local/local_settings.py
which now contains
OPENSTACK_KEYSTONE_URL = "http://10.0.3.2:5000/v3/"

# Overrides for OpenStack API versions. Use this setting to force the
# OpenStack dashboard to use a specfic API version for a given service API.
# NOTE: The version should be formatted as it appears in the URL for the
# service API. For example, The identity service APIs have inconsistent
# use of the decimal point, so valid options would be "2.0" or "3".
OPENSTACK_API_VERSIONS = { "identity": 3 }

# Set this to True if running on multi-domain model. When this is enabled, it
# will require user to enter the Domain name in addition to username for login.
OPENSTACK_KEYSTONE_MULTIDOMAIN_SUPPORT = True
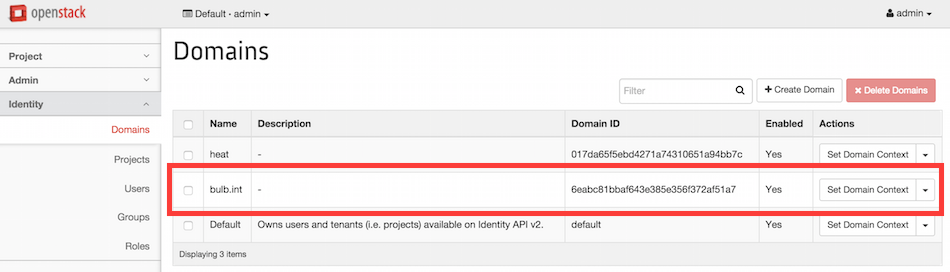
You can still authenticate using the admin credentials just by putting default in the Domain field. If you do so and if you go to the Identity > Domains menu you can confirm your domain was really created.
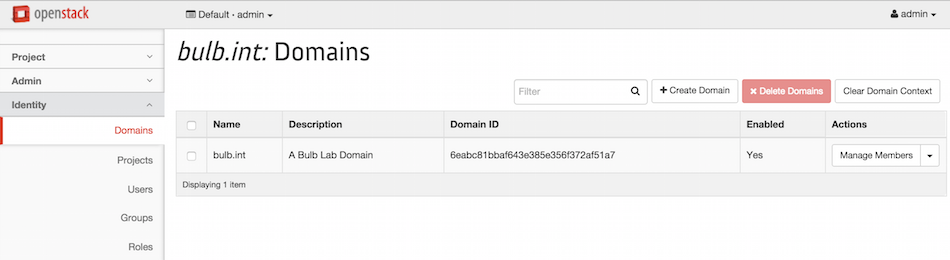
From this page you can restrict all operations to be executed on your domain by clicking on Set Domain Context. See below.
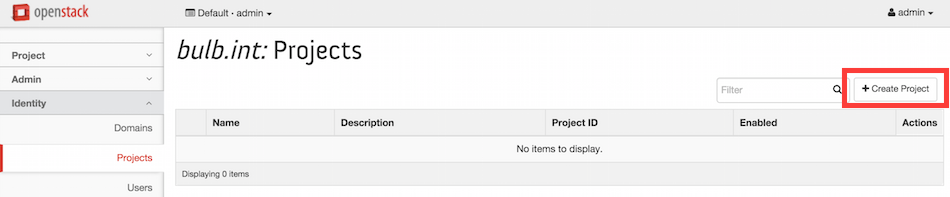
Now click on Identity > Projects > Create Project to create a project within the bulb.int domain,
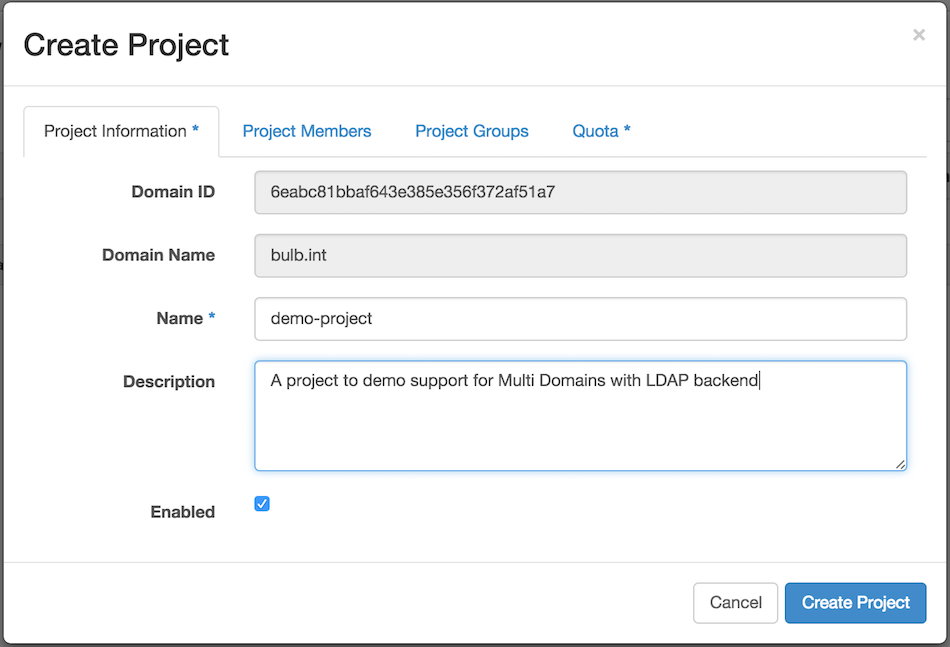
As you can see below the Domain ID and Domain Name are already filled with the bulb.int domain name and ID, you just have to input the project name and description. Click then on the Project Members tab.
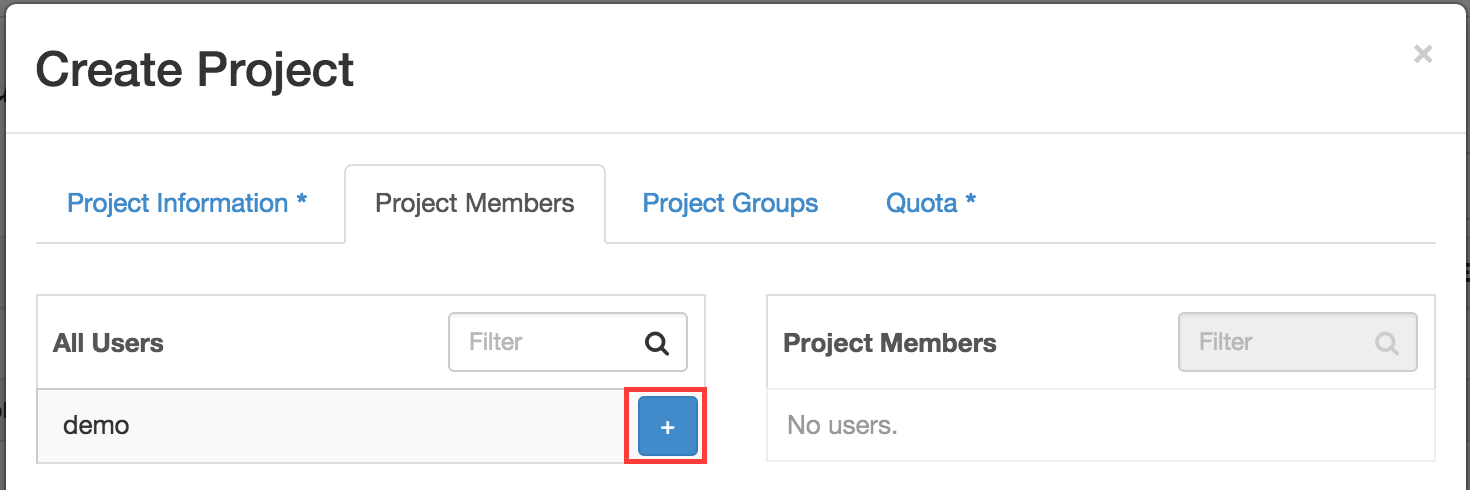
Now click on the + sign to add your demo user to this project and click on Create Project. We kept the default Quota for this new project.
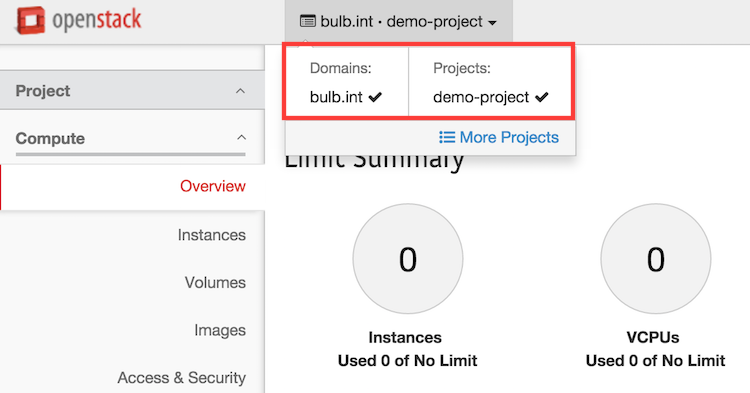
If you logout from the admin project, you can try to log back in using the bulb.int domain and the demo user using our mypass password. You should reach a page like this one, where domains and project are the one expected.
Everything worked as expected, if you had any issues while trying to do the above, continue reading.
Active Directory integration
Integrating with Active Directory is also possible, see below an example of a configuration that works.
[ldap]
user_enabled_attribute=userAccountControl
user_allow_delete=False
password=<password>
user=cn=Bind User,ou=Services,dc=bulb,dc=int
user_allow_create=False
user_allow_update=False
user_filter=
user_pass_attribute=
user_objectclass=person
suffix=dc=bulb,dc=int
user_id_attribute=sAMAccountName
user_tree_dn=ou=Corp,dc=bulb,dc=int
query_scope=sub
url=ldap://<AD-IP>:389
user_name_attribute=sAMAccountName

[identity]
driver=keystone.identity.backends.ldap.Identity
So you should fill out the LDAP plugin form with the specifics for AD integration:
- User Name Attribute: sAMAccountName
- User ID Attributed: sAMAccountName
- User Object Class: person
- User Enabled/Disabled Attribute: userAccountControl
And you shouldn’t put anything in the User Passord Attribute. Make sure you also check the specifics of your AD setup, that can differ from default above.
Troubleshooting
The first thing you should check if the testing failed is the accessibility of your LDAP directory from one of your controllers
First install on the OpenStack controller the ldap-utils package
controller# apt install ldap-utils
And try to access your LDAP directory
controller# ldapsearch -x -w mypass -D "cn=Manager,dc=bulb,dc=int" -b "dc=bulb,dc=int" -s sub "(objectclass=*)" -H ldaps://192.168.1.254
Next check your OpenLDAP logs
tail -f /var/log/syslog
You can increase the verbosity of logs in its configuration file /etc/ldap/slapd.conf
loglevel 9
Then restart it
/etc/init.d/slapd restart
If you’ve followed this article, most of the remaining problems should be caused by communication issues between your OpenStack control plane and the LDAP directory. So if it isn’t working still, you can investigate things further
controller# tcpdump -vvv -i br-ex port 389
controller# telnet <LDAP-SRV-IP> 389
Good luck ;)
Conclusion
As you’ve seen, LDAP Fuel Plugin allows to easily connect OpenStack control plane to an external LDAP directory by just providing at least the following informations:
- url - URL for connecting to the LDAP server
- user - BindDN to query the LDAP server
- password - Password for the BindDN to query the LDAP server
- suffix - LDAP Server suffix
- user_tree_dn - Search base for users
Keystone LDAP integration use the Standard LDAP objectClass inetOrgPerson. Just make sure it is compliant with the way your directory is structured, or at least change it in the Fuel plugin UI User Object Class variable.
If you have any feedback about this howto, you can reach me on LinkedIn.
Links
- Fuel LDAP Plugin repository
- Bennojoy OpenLDAP Ansible role repository
- Integrate Keystone with LDAP official documentation
- How to Integrate Keystone with Active Directory
- Keystone configuration