Mirantis OpenStack 6.0 (Juno) on vSphere
Since my last article about Fuel last June 2013, Mirantis have made great progress. It’s now a good time to review the current status of the recently released Mirantis OpenStack 6.0 Tech Preview which comes with many new features like complete integration with vCenter and NSX. They’ve also released on Dec 18, 2014 a reference architecture for a deployment integrating with VMware vCenter and NSX.
The first time I tried Fuel, I used VMware Fusion to host it. This time, I have a full 3-node vSphere/vSAN cluster up and running which I’ll be using in this article. So it will be a lot closer to a production environment but I won’t be implementating the reference architecture cited above which require bare metal servers for some components and NSX. In this test, everything will be virtualized, which is exactly how VMware Integrated OpenStack (VIO) is architected.
What’s new in 6.0
But lets start by a quick summary of the new features of 6.0 Tech Preview:
- OpenStack Juno 2014.2 Support on either CentOS or Ubuntu.
- Improved vCenter integration: vSphere as a *Glance
- backend, VLAN Manager now supported,
- Multiple L2 networks allows better multi-rack deployment (only from Fuel CLI)
- Decrease upgrade tarball size
- Upgrade of Openstack POC (w/o or w/ minimal downtime)
- Phone home mechanism to send Mirantis information about the settings, features, and deployment actions
Still under development for 6.0 GA (originally planned for dec 25 but seems late):
- Image-based provisioning (still experimental)
- Pluggable architecture to easily add functionnality
- HA stability and scalability improvements
- Certified 100 node support (Fuel only)
- Neutron ML2 plugin support for Fuel
- The Fuel UI allows users to set external DNS and NTP servers
- Support for vCenter with NSX-mh
- Sahara can run in vCenter environment
- The Fuel Master Node can be upgraded from 5.1.x to 6.0 GA
- Fuel 6.0 can update existing 5.x Mirantis OpenStack environments (Experimental)
You’ll find an exhaustive list of blueprints on the Fuel Launchpad site. If you prefer something more digest, consult to the release notes
Prepare vSphere for Fuel Master Node
First of all you’ll need to instantiate a physical network from which you’ll PXE boot your OpenStack Controller nodes.
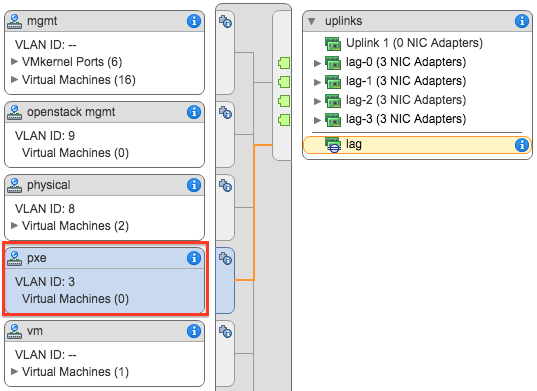
My lab networking is based on a HP 1810 24G v2 switch where I have configured VLAN 3 as the PXE network.

Lets create a corresponding vSphere Distributed Port Group, named pxe. Configure it to use VLAN 3 and make sure you customize default policies configuration to enable Promiscuous mode on that Port Group.
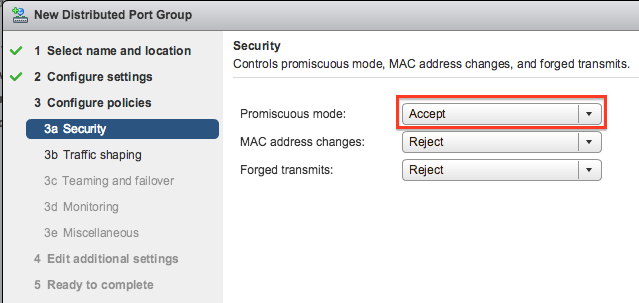
You can leave all the other settings as is. Just make sure the teaming and failover is setup correctly, in my environment I’m using a Link Aggregation Group (LAG) of four physical interfaces.
I’ll be using nova-network in this lab, so we need to create a port group where instances will be automatically connected. At this stage nova-network only support vSwitches and the port group need to be named br100. Check you don’t have any DHCP server responding on this br100network. Last important thing, you absolutely need to have vmnic0 at least as the uplink for your vSwitch or OpenStack won’t be able to deploy any instances.
Fuel Master Node
Fuel enable you to deploy and manage multiple clouds, remove nodes from one cloud to add them to another, or even remove entire clouds and return their resources to the available pool. It also provides pre-deployment network verification, a battery of post-deployment health checks and log management. It’s the cornerstone of Mirantis OpenStack. In its latest incarnation (since version 5.0) it uses Docker to isolate the different services:
- Nailgun - implements a REST API as well as deployment data management. It use a Postgres SQL database also containerised to store its data and an AMQP service to communicate with workers
- Astute - the Fuel component that represents Nailgun’s workers (config at /etc/fuel/astute.yaml)
- Cobbler - PXE network installs server (will be replaced by Ironic)
- Nginx - web server
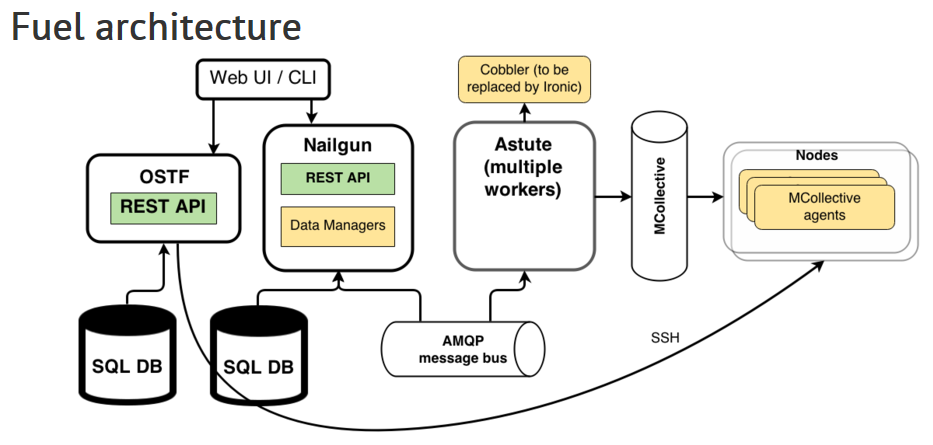
To get more details on the overall architecture, consult the official architecture diagrams.
If you want to do this hands on, you need to Download OpenStack Mirantis 6.0 ISO and upload it to a vSphere Datastore.
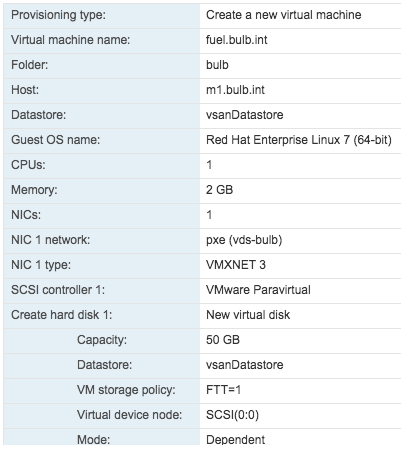
Lets now create a vSphere VM to host our Fuel server and boot it from the previously downloaded ISO. VM form factor should be at least the following :
| Profile for Fuel Master Node | |
|---|---|
| OS Type | Linux Red Hat Linux 7 64bit |
| CPU | 1 vCPU |
| Ram | 2048 MB |
| Disk | 50 GB |
| Nic 1 | pxe |
It should look like this
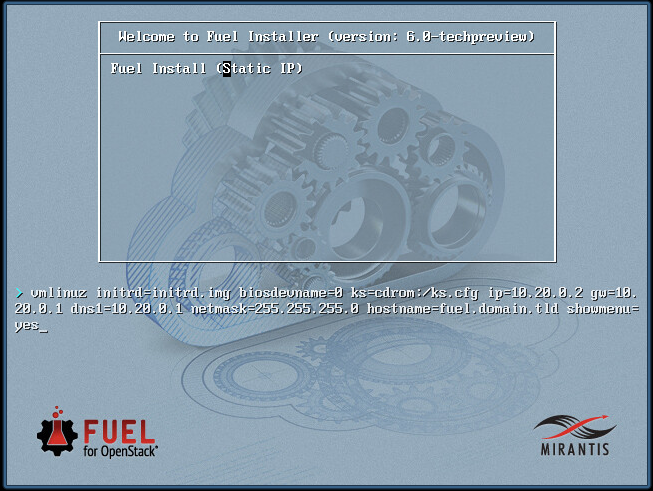
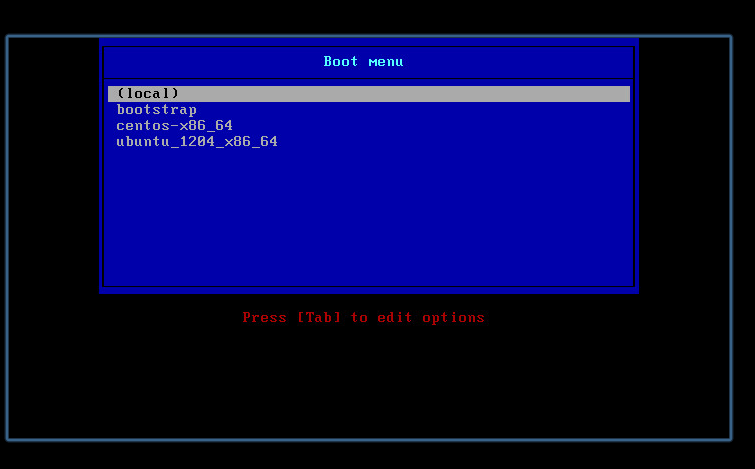
Next you just need to boot it and attach it to the Mirantis OpenStack 6.0 Tech Preview ISO.
At the boot screen press TAB and change the last kernel parameter to showmenu=yes, it will give you the opportunity to customize the installation to better suit your need.
Now the operating system is provisioned
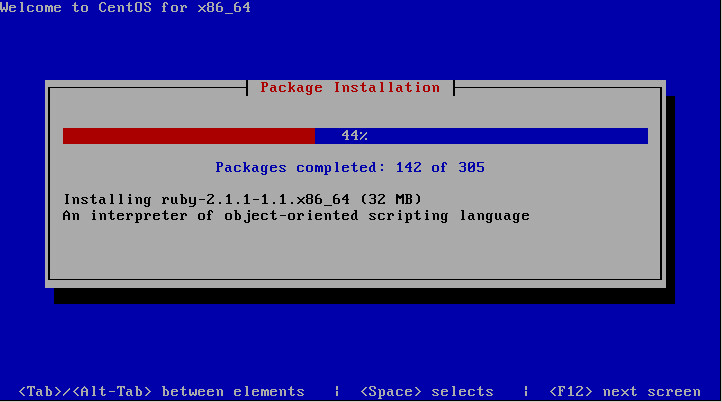
When the CentOS installation finish, you should then reach the Fuel setup menu. Adapt the networking,ntp,dns,… settings to your environment and select Save and Quit.
Fuel will then untar fuel-images.tar which contain the docker images for the different Fuel Services (STATELESS: mcollective, nginx, ostf, nailgun, rsyslog, keystone, rabbitmq, STATEFULL ones: Astute, Cobbler, nsenter, postgres, UNKNOWN STATE: busybox, rsync).
Note: Make sure you have at least 2GB of RAM or this step will fail. All the docker images are stored in the /var/www/nailgun/docker/images/ directory.
At the end of the installation you should be able to reach the Fuel Web UI using the IP address selected in the previous step. Make sure you have IP Connectivity to this network range from your browser. In my environment I left the default setting for eth0, so Fuel Web UI is now accessible on the following URL with the default admin/admin login/password.
http://10.20.0.2:8000

Start by clicking on Change password to update the admin password of the Web UI.
Before deploying our first OpenStack environment we need to activate the experimental features of the Tech Preview. Start by logging in to the Fuel VM using root/r00tme default login/password.
Edit /etc/fuel/version.yaml to add experimental to the feature_group
    VERSION:
      ...
      feature_groups:
        - mirantis
        - experimental
Restart nailgun and its dependencies
    dockerctl restart nailgun
    dockerctl restart nginx
    dockerctl shell cobbler
    cobbler sync
Finish this process by login out.
exit
Create an OpenStack Environment
From the Fuel Web UI, accessible by default on http://10.20.0.2, you can now create an OpenStack Environment.
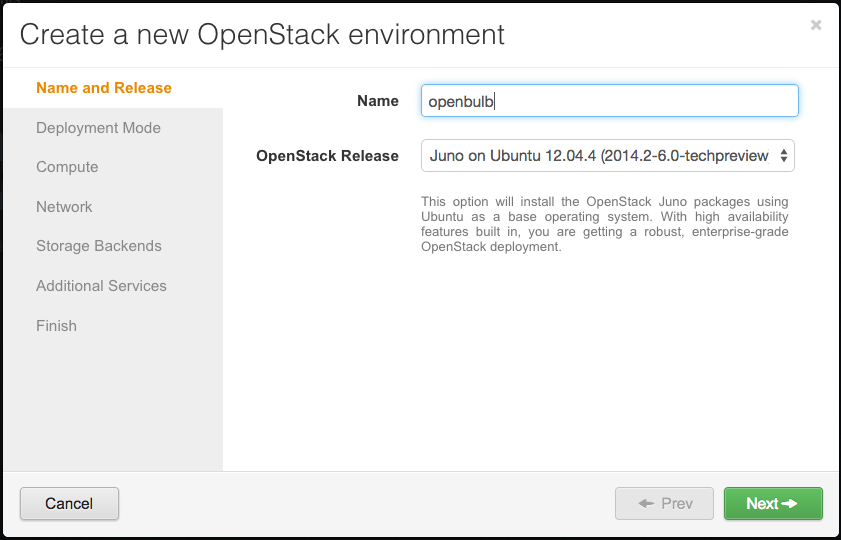
Click on New OpenStack Environment and follow the wizard.

Name it and select the prefered release/os.
Note: I advice you to choose CentOS 6.5 for the smoothest experience, I had issues with Ubuntu 12.04, remember it’s a Tech Preview.
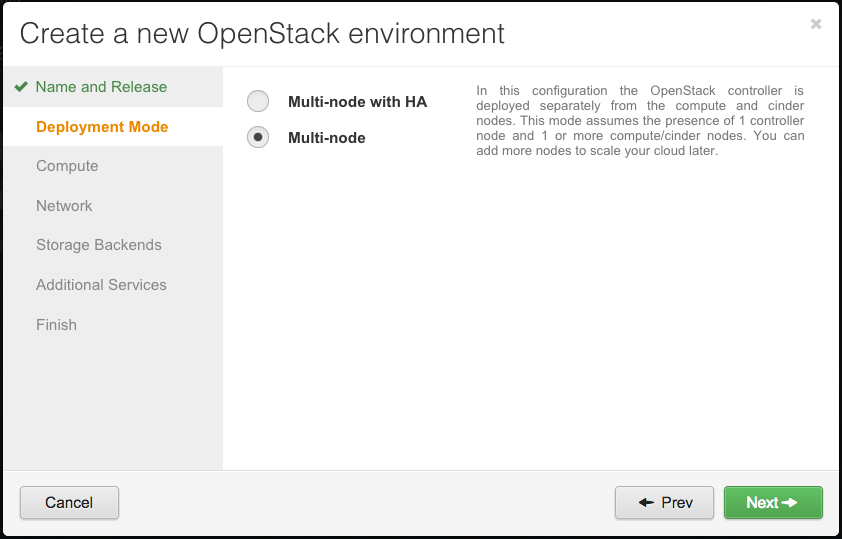
Select the deployment mode, just a hands on lab so I don’t need HA for now.
Select vCenter for Comput and fill out the IP/credentials of your vCenter.
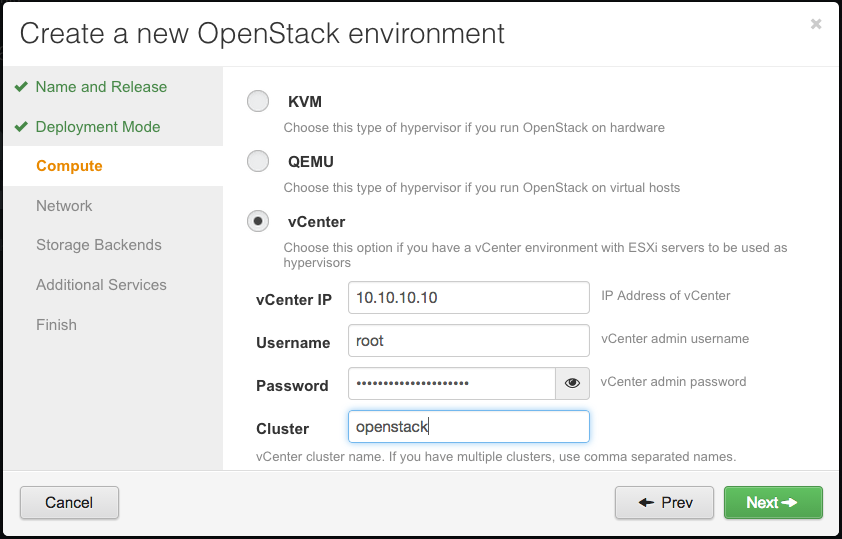
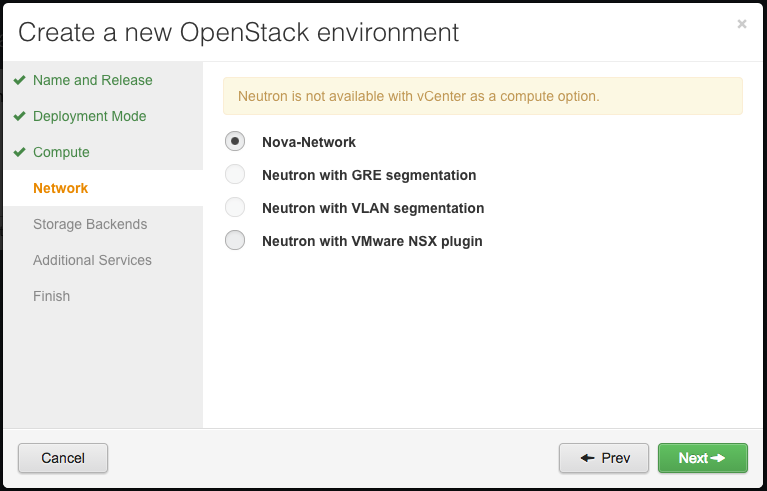
Choose the OpenStack Networking Option, if you are like me and want to use the vCenter integration, the only available option are nova-network or NSX.
Note: that NSX integration only works with NSX Multihypervisor (NSX-mh) and is still in development for 6.0 GA, so I’m not using it for now.
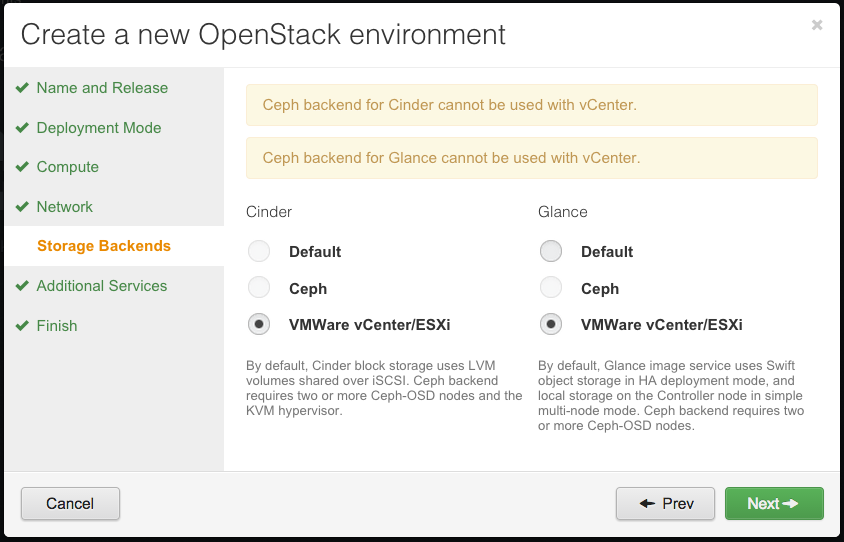
Select the Storage backend
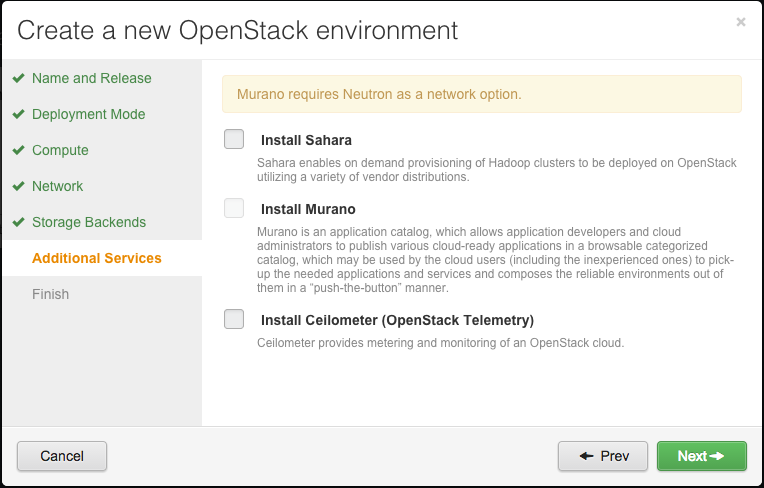
Some additional services like Murano and Ceilometer. Lets keep it simple for our first trial.
Note: Murano require Neutron as the Network option, so with vCenter you’ll need the NSX-mh environment also, here is grayed because I’ve choosen nova-network earlier.
You can now click Create to commit your new environment.
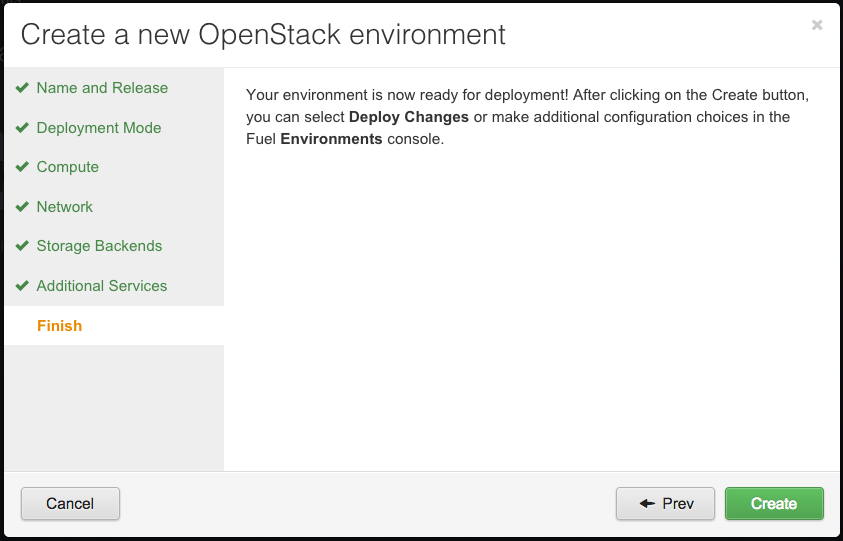
Here is what you should get when the wizard complete the environment creation
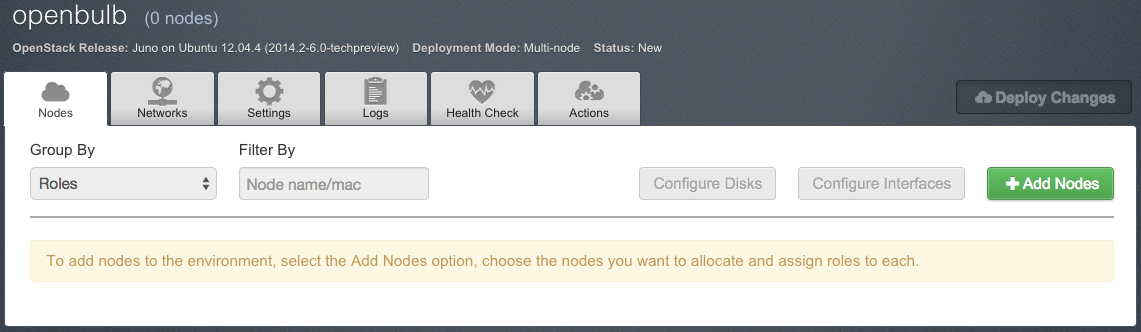
Configure your OpenStack Environment
Before adding any node to it, we still need to adjust few parameters.
First click on the Settings tab and update the following parameters:
- OpenStack Password
- Public Key: paste your public key here.
- Syslog Hostname: put the IP Address of your log collector
- VMware vCenter/ESXi datastore for images (Glance): set vCenter IP, credentials and Datacenter/Datastore name
- Zabbix Password
- Provision method: Image (for snappier deployment of OS)
You can leave the default values for pretty much all the others, but take a look to adapt to your needs.
When you’re done, click Save Settings.
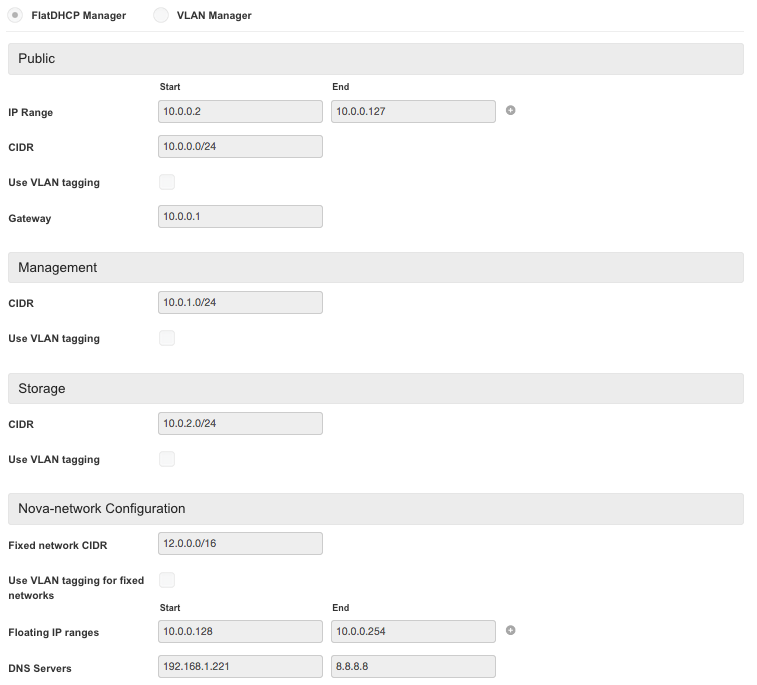
Next click on the Network Tab. Lets keep this first deployment as simple as possible by using nova-network and the FlatDHCPManager for now. As you’ll see in the screenshot below, you’ll need the following networks configured in your environment for your deployment to work:
- public: 10.0.0.0/24
- management: 10.0.1.0/24
- storage: 10.0.2.0/24
- nova-network: 12.0.0.0/24
Be really carefull here, you’ll have to start from scratch if you make any mistakes. Adapt the IP Addressing to your own scheme. I’m not using any VLAN Tagging at the Fuel level, all this is done at the VMware Distributed Switch instead.
My network setup looks like this:
Adding a Controller Nodes
Your environment is now ready to accept new nodes. As soon as you power on new VMs on the PXE network, they will be automatically detected by Fuel.
So lets create our first node with the following characteristics.
| Profile for First Controller Node | |
|---|---|
| OS Type | Linux Red Hat Linux 6 64bit |
| CPU | 1 vCPU |
| Ram | 1024 MB |
| Disk | 16 GB |
| Nic 1 | pxe |
| Nic 1 | public |
| Nic 1 | management |
| Nic 1 | storage |
| Nic 1 | nova-network |
Note: If you do all your work from the Fuel Web UI, all nodes will require all the same network connectivity even for example in the case of a Cinder node, it’s not the case.
Power on this VM and check it’s effectively PXE booting by looking at its vSphere console.
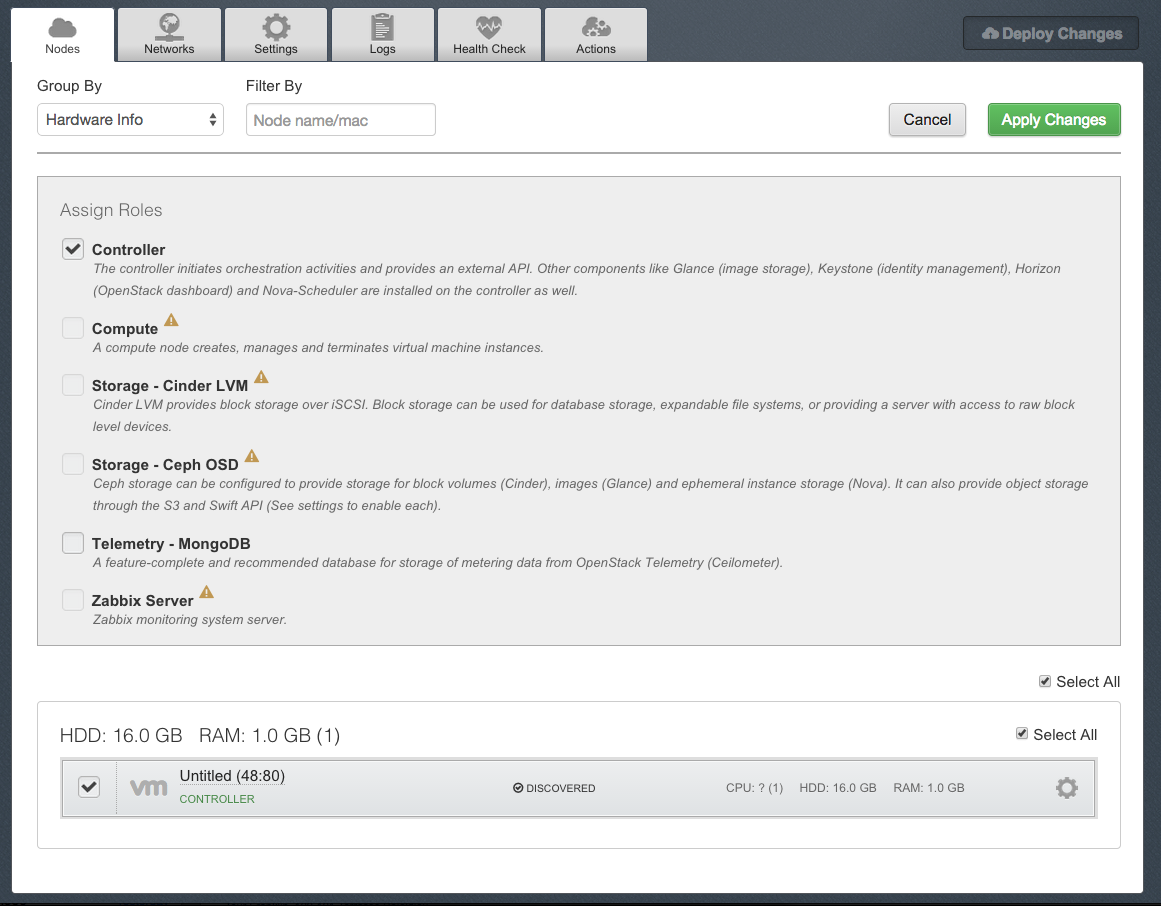
After a while it should appears on the Fuel UI as an unallocated node. Assign it a role by clicking on Add Nodes within your environment. Because we use vSphere as the hypervisor we just need a Controller to start playing with OpenStack Juno on vSphere, so as you’ll see below, I’m assigning this role to our node.
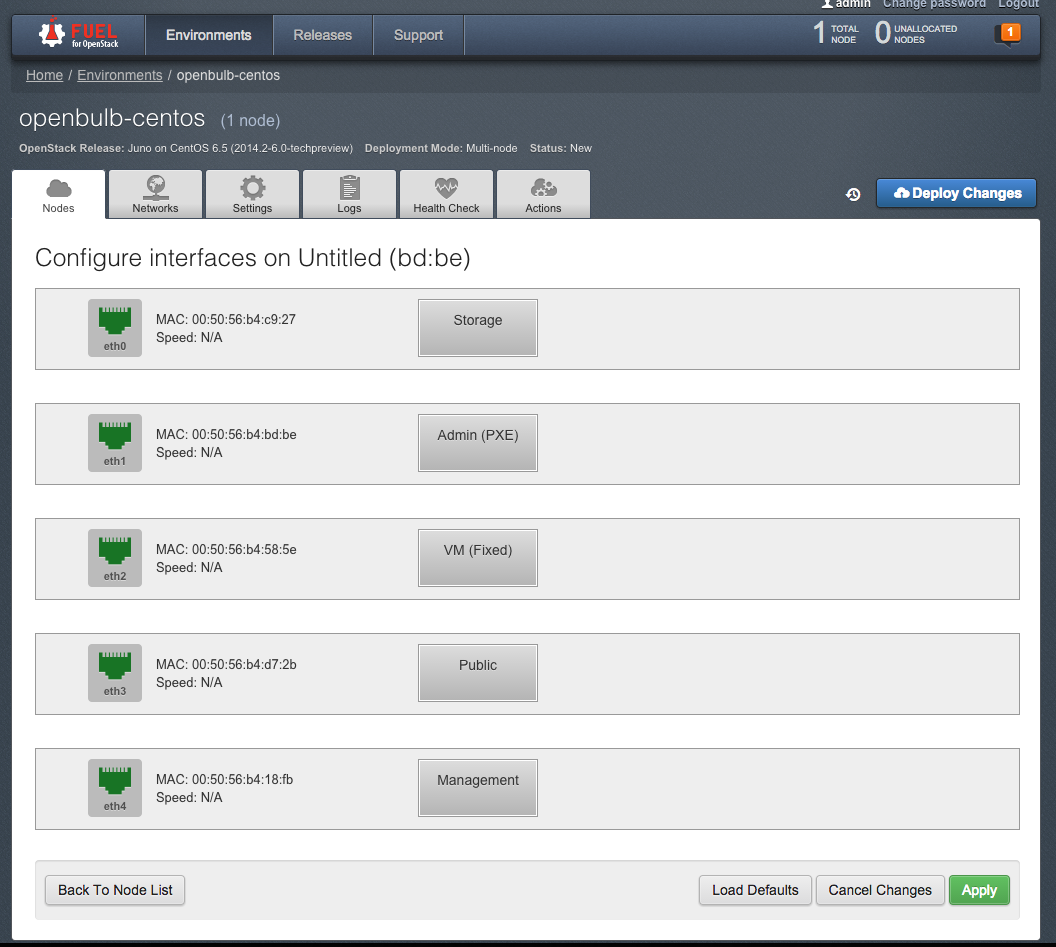
Now click on the recently added node and then on Configure Interfaces, check the corresponding Mac Address of each vNic from the vSphere Web UI to make sure you drag and drop the correct network to the correct interface. Nice UI !!!
Deploy changes
After all this, you really deserve a little break, click on Deploy Changes and take one.
It gonna take a bit before you can play with your cloud.
If you’re lucky, here is what you should get at the end of the installation :

As you can see above, I’ve also added Zabbix role to another node, you can do the same anytime. This is the good part of Fuel, it’s not only meant to deploy your environment but could be used to scale it up or add other components afterwards.
OpenStack Health Checking (OSTF)
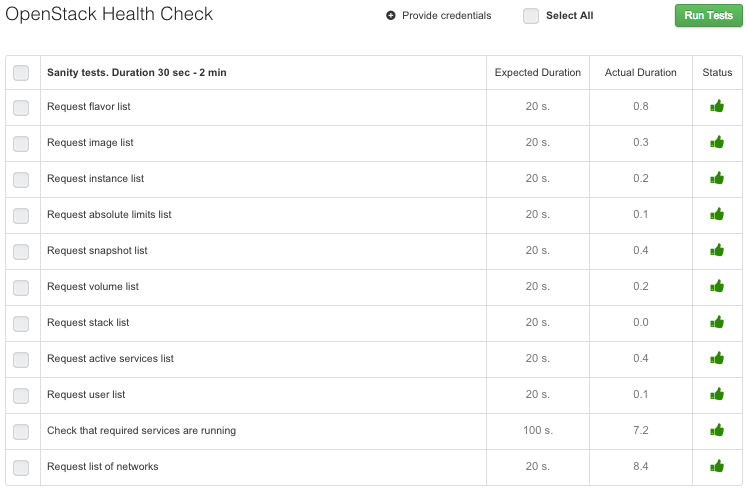
Instead of doing the usual manual testing of your cloud, you can now click on Health Check instead.
Select the ones you want and click Run Tests.
If you’ve got any red hands, the hunt begins, may the force be with you. Good luck ;)
Conclusion
Fuel 6.0 is one of the more robust solution to deploy and maintain an OpenStack environment. Mirantis team is doing a great job to insure it becomes simple to deploy a production ready virtual datacenter with the many components OpenStack offers like : Murano (Application Catalog), Ceilometer (Telemetry), Sahara (Hadoop).
Note: I haven’t choosed Murano yet because it require NSX if you use vSphere for compute.
Fuel Main benefits:
- OpenStack Health Checking - great to quickly check the sanity, operational state of your deployment.
- Support of the latest OpenStack Juno release for both Ubuntu 12.04 and CentOS 6.5
- Fuel Master Node can be upgraded and still manage and earlier OpenStack deployment
- Easy drag and drop node networking setup, really nice.
- Logging at your fingertips, from Fuel Web UI itself.
- No more hard requirement of VLANs support like in version 3.
- Native vSphere integration
Drawbacks:
- Many failures with Ubuntu based provisionning, so I used CentOS which I find better integrated in the overall Mirantis OpenStack solution. I never had any failure with CentOS.
- Installation progress switch from 29% to 100% without anything in between when trying with Ubuntu.
- vSAN datastore seems problematic to consume from a Mirantis OpenStack deployment for instance ephemeral disks, I’ll investigate this issue further. For now I’m only able to consume local datastore but Glance is able to consume vSAN with some tuning (see in the FAQ).
Note: Image based deployment isn’t yet operational in this Tech Preview, just be patient, we’ll get there. Having a faster OS provisionning would be great !!!
That’s it for today. I hope you’ll enjoy Mirantis OpenStack 6.0 as mush as I did.
PS: I’ll come back and update this article if I find anything new or when I’ll try 6.0 GA.
FAQ
How to report a bug
How to backup and restore Fuel Master Node
My Cirros Instances aren’t getting their expected IP Addresses.
- First make sure you don’t have another DHCP server operational on your nova-network.
- Then check the correct interface of your Controller is connected to the nova fixed network on the
br100port group - To check if it’s fixed, restart Cirros networking with /etc/init.d/S40network restart
I cannot access my instance VNC Console
By default ESXi Firewall denies VNC traffic. So lets enable this by customizing the ESXi Firewall ruleset.
SSH to your ESXi node and follow this process
# cp /etc/vmware/firewall/service.xml /etc/vmware/firewall/service.xml.orig
# chmod 644 /etc/vmware/firewall/service.xml
# chmod +t /etc/vmware/firewall/service.xml
Edit the firewall ruleset
# vi /etc/vmware/firewall/service.xml
And add the following rule
<service id='0038'>
<id>VNC</id>
<rule id='0000'>
  <direction>inbound</direction>
  <protocol>tcp</protocol>
  <porttype>dst</porttype>
  <port>
    <begin>5900</begin>
    <end>6105</end>
  </port>
</rule>
<enabled>true</enabled>
</service>
Note: In addition to the default VNC port numbers (5900 to 6000), 6101, 6102, and 6105 are also used which explain the range above.
Revert the protection on this sensitive file
# chmod 444 /etc/vmware/firewall/service.xml
# chmod +t /etc/vmware/firewall/service.xml
Refresh the ruleset
# esxcli network firewall refresh
Confirm its done
# esxcli network firewall ruleset list
It’s also a good idea to check remotely with nmap that TCP/5900 is open for example
$ nmap -Pn -p 5900 <ESXi_IP>
To check what ports the launched instances are listening on, these ports are where the embedded VNC listens on
# esxcli network ip connection list|grep vmx
For a quick and dirty fix, you can also enable the gdbserver firewall rule from the vSphere Web UI > ESXi Host > Manage > Settings > Security Profile > Edit > Enable gdbserver
By the way if you want to access a non OpenStack VM using the ESXi embedded VNC Server, you just need to add the following line to its vmx
RemoteDisplay.vnc.enabled = “TRUE”
RemoteDisplay.vnc.password = “Enter password”
RemoteDisplay.vnc.port = “<Enter port number between 5900-5964>″
RemoteDisplay.vnc.keymap = “uk”
Read this OpenStack documentation for all the gory details.
Why it takes longer to deploy the first instance for each image ?
Directly from the OpenStack documentation. The ESX hypervisor requires a copy of the VMDK file in order to boot up a virtual machine. As a result, the vCenter OpenStack Compute driver must download the VMDK via HTTP from the OpenStack Image Service to a data store that is visible to the hypervisor. To optimize this process, the first time a VMDK file is used, it gets cached in the data store. Subsequent virtual machines that need the VMDK use the cached version and don’t have to copy the file again from the OpenStack Image Service.
If you want to avoid another copy operation from the cache location to the hypervisor file directory in the shared data store for each launched instance, make sure you have use_linked_clone = True in nova.conf. Per image Override configuration is also possible by setting vmware_linked_clone boolean property on images in Glance.
Keep in mind images are only cached for 24h and removed if unused by default. You can keep them forever by setting remove_unused_base_images = False or just extending the period remove_unused_original_minimum_age_seconds = 172800
Image upload hangs with Client disconnected before sending all data to backend message
Connect to your controller node and edit /etc/glance/glance-api.conf, make sure you’re using an ESXi IP address that have access to the datastore specified as the backend for Glance. For example:
vmware_server_host=192.168.1.241
Instead of the IP address of the vCenter which is also possible but seems to be causing issues.
Because you are specifying a host, you can comment out the following line
#vmware_datacenter_path=bulb
Next check the following important configuration lines
vmware_datastore_name=vsanDatastore
vmware_store_image_dir=/openstack_glance
After changing that file, restart the Glance API service
# /etc/init.d/openstack-glance-api restart
Try to upload a new image to Glance
$ glance image-create --name ubuntu-12.04 --is-public=True --container-format=bare --disk-format=vmdk --property vmware-disktype="preallocated" < ubuntu-12.04-server-cloudimg-amd64-disk1.vmdk
Check the logs
# tail -f /var/log/glance/api.conf
Check it was uploaded
$ glance image-list
Links
- Mirantis OpenStack 6.0 documentation
- Fuel Development documentation
- Fuel architecture
- Fuel wiki
- Fuel blueprints
- Fuel sequence diagrams
- Nova VMware related configuration options
- NovaVMware developer guide
- VMware OpenStack Juno Configuration Reference