Deploying OpenStack Grizzly using Fuel 3.0
If you tried to deploy OpenStack by yourself there a huge probability it failed and you may have given up after multiple unsuccessful tries. Some Linux distribution like Redhat or Suse are packaging everything for you to make things easy but today we’ll look at another alternative from Mirantis a company that just got a new round of financing from Redhat, SAP Ventures and Ericsson. This company offers an easy way to build up an OpenStack cloud environment, Fuel 3.0.
About Fuel 3.0
Fuel offers two alternatives:
- Fuel Web, an interface to easily provision your OpenStack cloud from bare metal
- Fuel CLI, which offers the best flexibility but require a little bit more effort.
It’s not the only thing that Fuel brings to the table. Mirantis is also offering:
- High Availability implemented with Galera, HA Proxy and Keepalived,
- Logging and Monitoring
- Configuration Management
- Operating System provisionning with support for Ubuntu, SUSE and CentOS
Without sacrifying anything to flexibility or Openess, it’s Apache 2.0 licensed. If you want maximum flexibility.
Fuel works by first deploying a master node which embed :
- Puppet, a Configuration Manager system.
- Cobbler, an install server.
Fuel provision bare metal server or VM by booting them on a bare OS that will be used to install their respective OpenStack components.
In this howto we’ll choose the easy road, the Fuel Web based graphical console and one of the pre-defined architecture.
Download the ISO
You’ll first need to download Fuel Web iso, which is available behind this registration form.
Fuel Architectures options
When you deploy a private cloud, the amount of options available to you could be frightening. Fuel greatly simplifies all this by offering only pre-defined deployment architectures :
- Single node - install Horizon, Glance, Keystone, Nova inside a single VM
- Multi node without High Availability - to try additional services like Cinder, Quantum and Swift (which can be installed on a dedicated node or on your controllers itself)
- Multi node with High Availability - for production environment
But Fuel can also be completly customized to your needs. For a start, let’s select the Multi node without HA architecture to see everything with a reasonable amount of resources consumed. r
Admin node
Once you’ve downloaded the FUEL Web ISO, you just have to create a VM in any hypersivor you have available, they provide a script which automate the process if you’re using Virtual Box. In our case, we’ll be using VMware Fusion. So let’s create a VM with the following specifications:
| Param | Value |
|---|---|
| OS Type | Linux Red Hat Linux 6 64bit |
| CPU | 1 vCPU |
| Ram | 1024 MB |
| Disk | 16 GB |
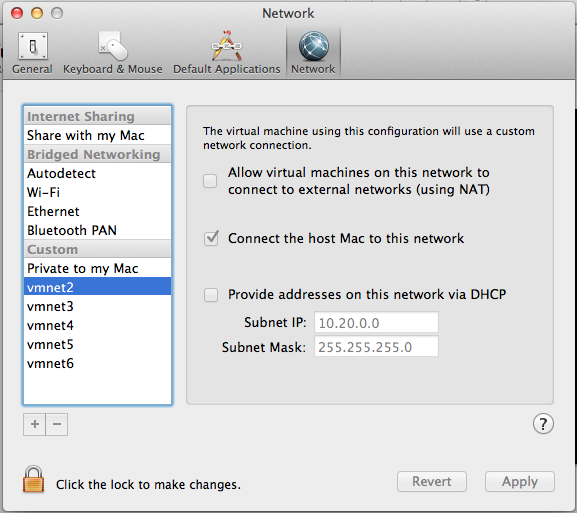
| vNic | vmnet2 |
The vNic should be connected to a private network without DHCP running. To create vmnet2, use VMware Fusion Preference menu. Add a new Custom Network by clicking on the + icon. Make sure you’ve typed 10.20.0.0 in the Subnet IP field and that you’ve un checked: Provide addresses on this network via DHCP. See below.
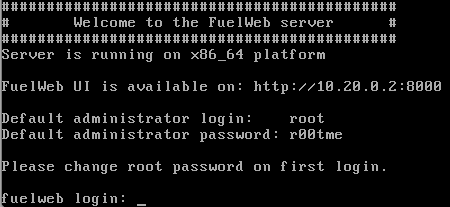
Power on this VM to start the admin node installation. After a little while, you should see a welcome message where you’ll find the URL to connect to the Fuel Web UI.
Networking configuration
Before going any further with our cloud, we have to think about a design for our private cloud. The focus of this howto is on a basic installation of Grizzly, we’ll choose a FlatDHCPManager setup where all VMs on a hypervisor share the same broadcast domain. In a follow up we’ll see how we could leverage Quantum with a Fuel Library (scripted) installation.
Such a “Flat” network topology could be usable in a homogeneous relatively small environment without tenants like a small web farm. FlatDHCPManager relies on a bridge, br100, created on every compute node. Each VM will connect to that bridge and will be able to see any other VM traffic in our cloud. There isn’t any isolation between workloads in this scenario.
So here is the kind of network architecture we’ll use
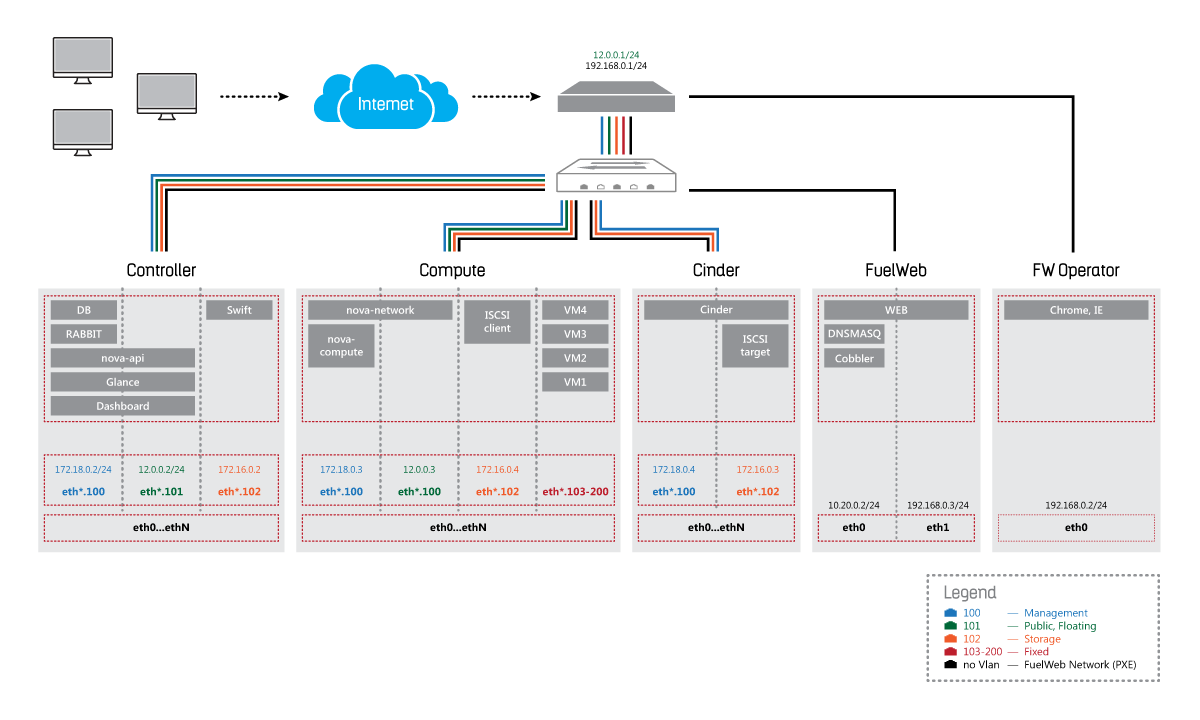
Let’s tweak this diagram a little bit with the following networking setup.
| Network Name | Use | Tagging | Addressing | Fusion Network |
|---|---|---|---|---|
| FuelWeb | FuelWeb internal communications and PXE booting | untagged | 10.20.0.0/24 | vmnet2 |
| Public/Floating network | virtual machines in/out traffic | vlan 101 | 12.0.0.0/24 | vmnet3 |
| VM Network (Fixed) | virtual machines network | vlan 104 | 10.0.0.0/24 | vmnet4 |
| Storage network | storage traffic | vlan 103 | 172.16.0.0/24 | vmnet5 |
| Management network | internal OpenStack communications | vlan 102 | 192.168.0.0/24 | vmnet6 |
So now you need to create all those customs VMware Fusion Networks using the Fusion preference menu. Each vmnet should be a custom network without DHCP running.
Only the FuelWeb interface cannot be changed from the Fuel Web UI. It’s the interface from which the node was initially booted but beware, once the networking configuration is specified it cannot be changed after the cloud deployment have been made.
Provision Slave nodes
Create 3 VMs using VMware fusion with the following profiles
| Profile for one OpenStack Controller Node | |
|---|---|
| OS Type | Linux Red Hat Linux 6 64bit |
| CPU | 1 vCPU |
| Ram | 1024 MB |
| Disk | 16 GB |
| Nic 1 | vmnet2 / FuelWeb net |
| Nic 2 | vmnet3 / Floating net |
| Nic 3 | vmnet4 / Fixed net |
| Nic 4 | vmnet5 / Storage net |
| Nic 5 | vmnet6 / Mgt net |
| Profile for two Compute Nodes | |
|---|---|
| OS Type | Linux Red Hat Linux 6 64bit |
| CPU | 1 vCPU |
| Ram | 2048 MB |
| Disk | 16 GB |
| Nic 1 | vmnet2 / FuelWeb net |
| Nic 2 | vmnet3 / Floating net |
| Nic 3 | vmnet4 / Fixed net |
| Nic 4 | vmnet5 / Storage net |
| Nic 5 | vmnet6 / Mgt net |
Don’t forget to enable hypervisor application in the VM settings of the compute nodes to be able to use KVM instead of QEMU.
Power on all of the slaves nodes, by being connected to vmnet2, the admin node will be able to automatically PXE boot them in memory with a stripped down version of CentOS. Root password of the nodes is
r00tme
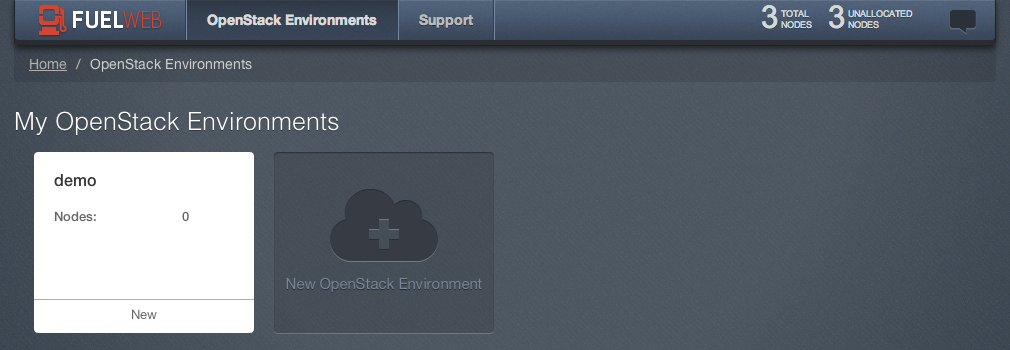
If you check Fuel Web interface accessible at http://10.20.0.2:8000, you’ll see all of your nodes as Unallocated.
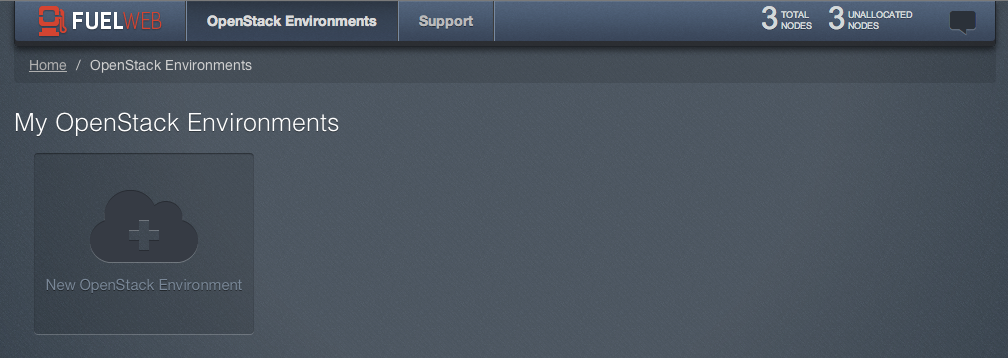
Click on New OpenStack Environment to create a new cloud.

Click on the newly created demo environment to assign nodes to it.
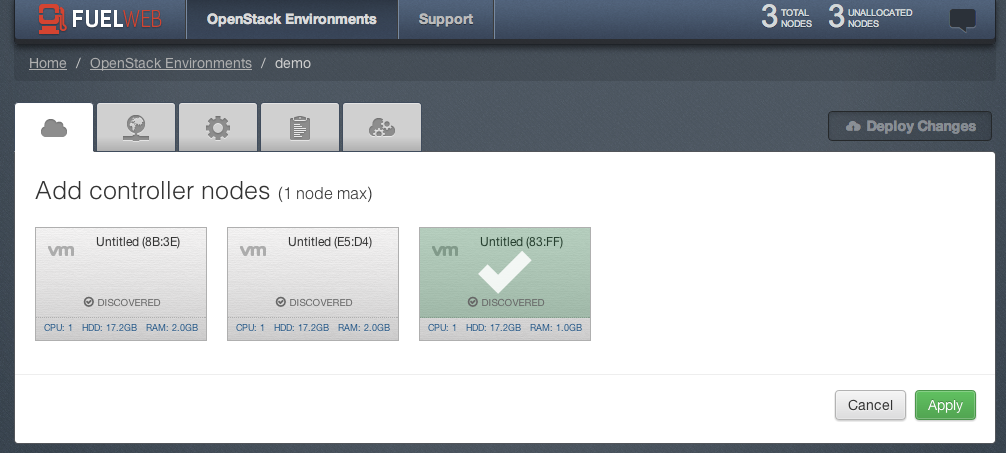
Click on + Add for Controllers and select the node with 1 GB RAM.
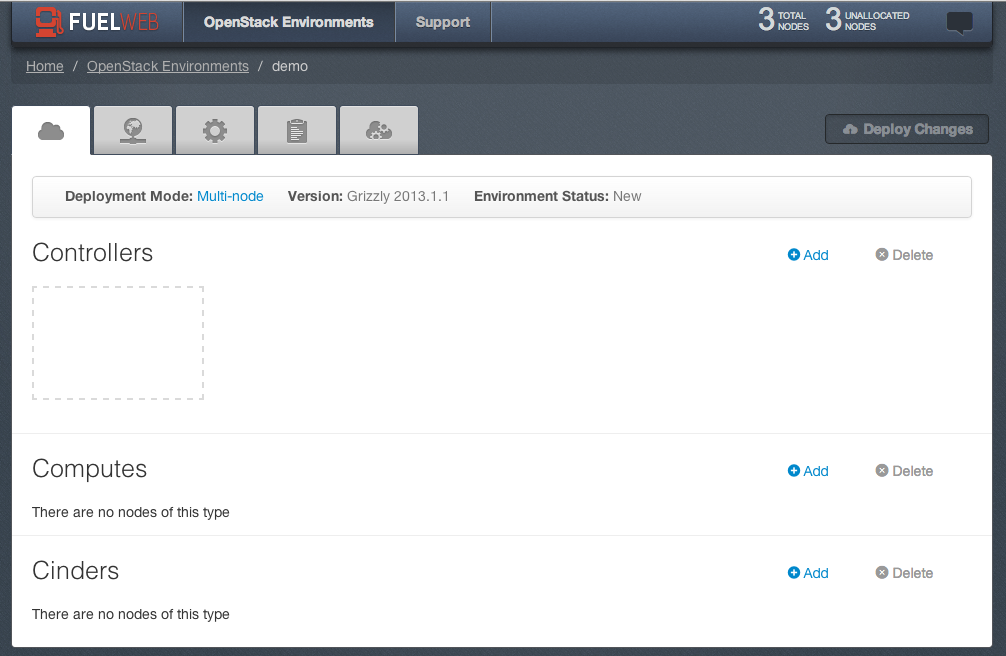
Click on + Add for Compute nodes and select all the remaining nodes.
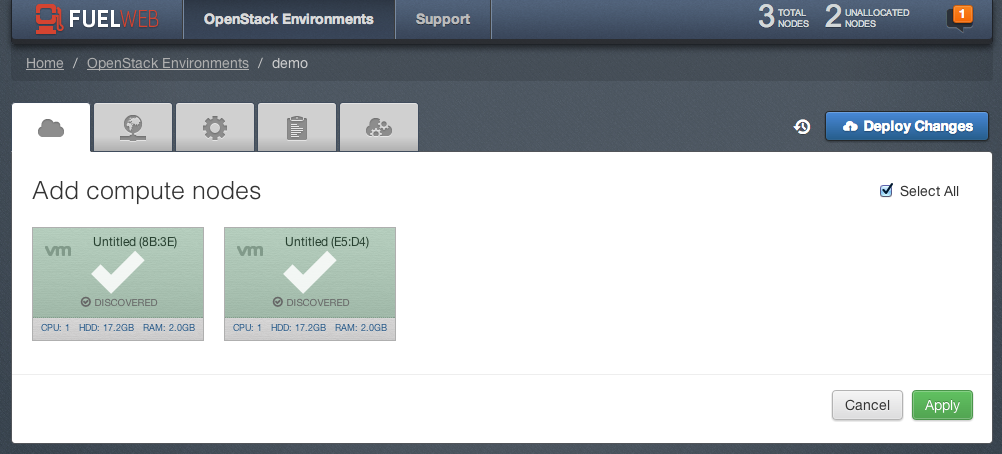
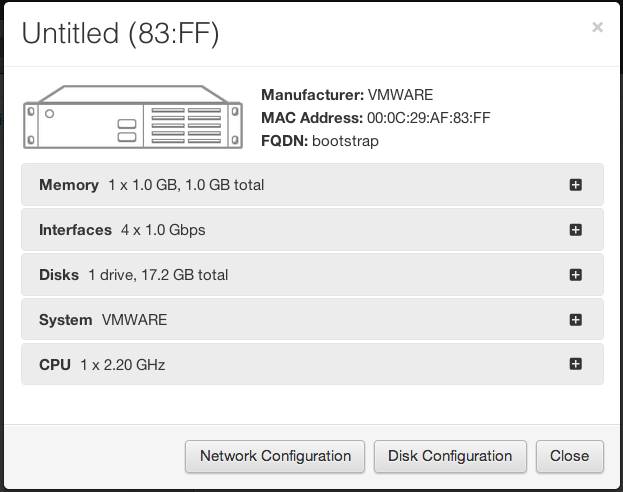
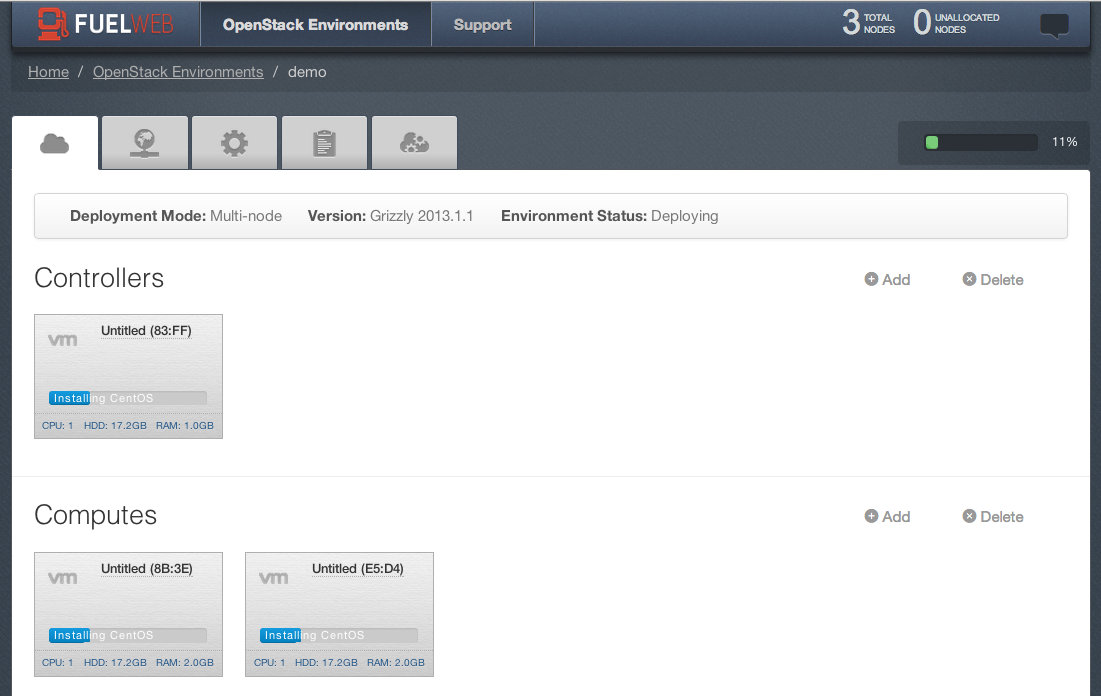
You should now see something similar to the following screen.

If you want you can click on Untitled to give a better name to your instances.
To configure your nodes, click on the bar where you see CPU: 1 HDD: 17.2GB RAM: 1.0GB.
Click on Network configuration and make sure you move around the networks as shown below.
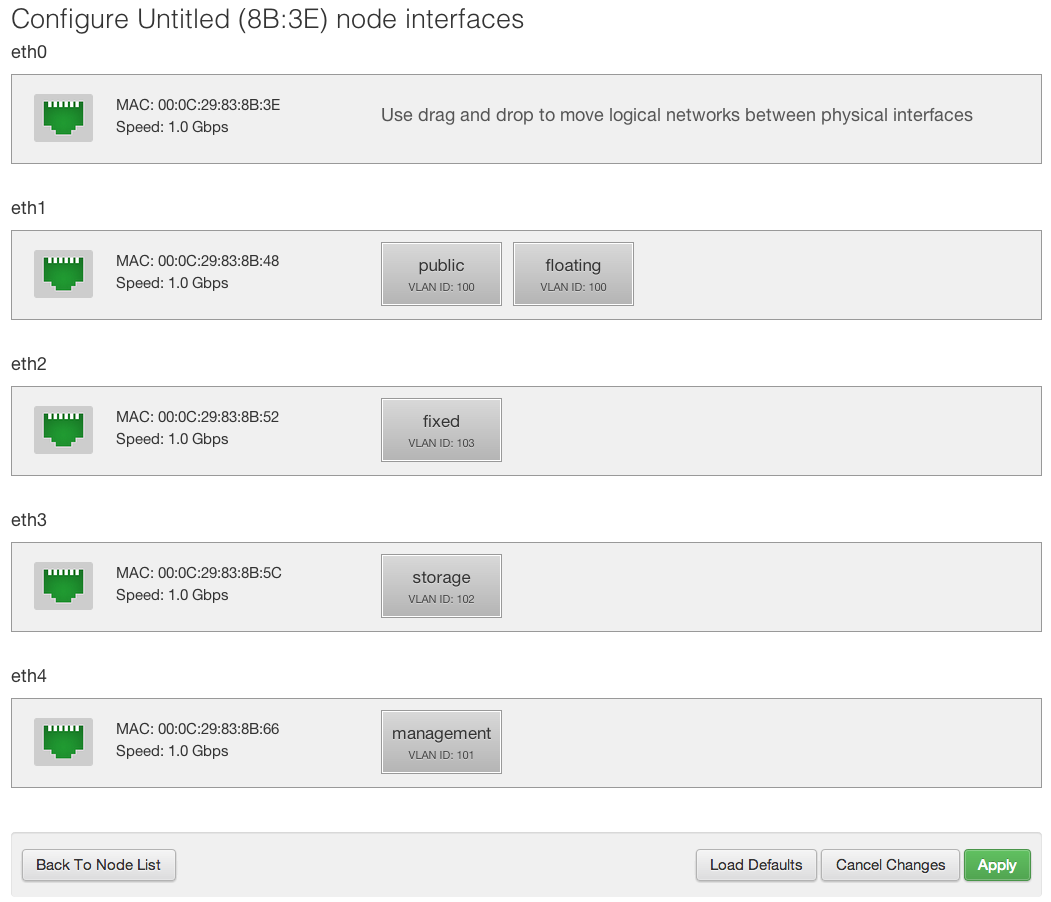
Do this and click Apply for each of your 3 nodes. eth0 stays unassigned because it’s used internally by Fuel for Bare metal provisionning and isn’t configured from the Web UI.
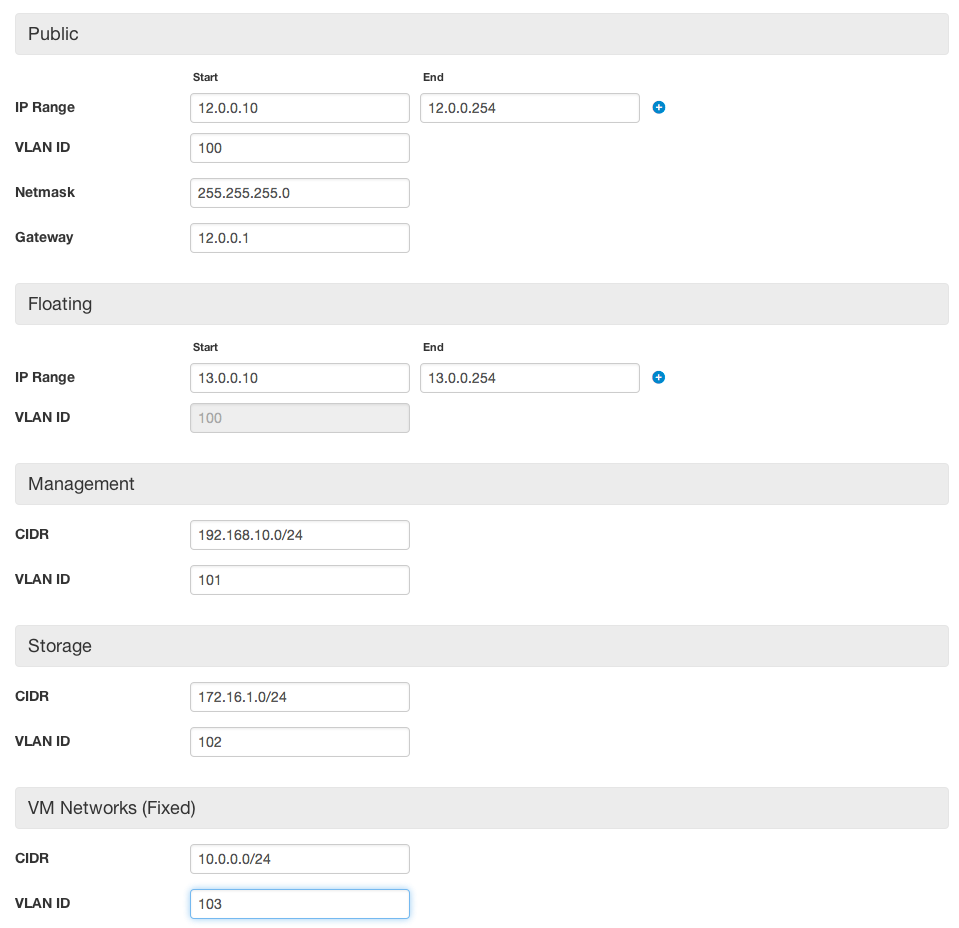
We are almost ready to deploy our cloud, the last step is network addressing configuration. Click on the Networking Tab to review the default setup. Update your configuration depending on your environment, you can copy the values you see in the following screen.
Click on Save Settings.
You can click on Verify Networks to make sure everything looks good.
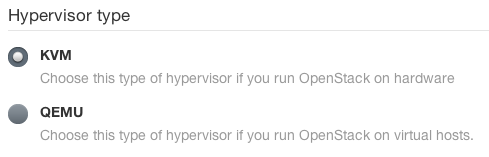
Click on the thrid tab to configure OpenStack settings. Change hypervisor type to KVM. You can also add your public key at the bottom of this page, this will allow to easily connect to your nodes. By default nodes don’t access password authentication.
Click Save Settings.
Ready, Set, GO, click on Deploy Changes.
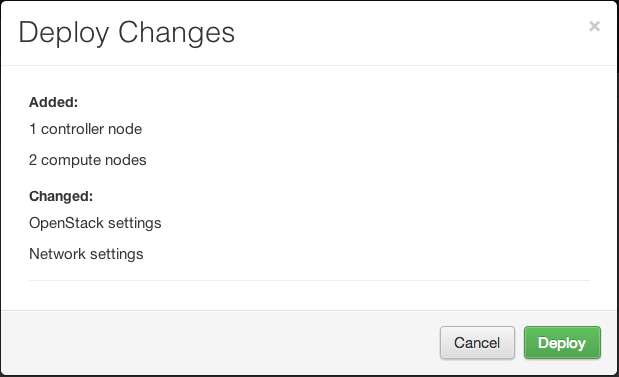
Click on Deploy and wait until your deployment finish. It could take a little while, so it’s a good time for a break ;) If you’re curious about what’s happening, you can look at the VMs console to see them rebooted and installed.
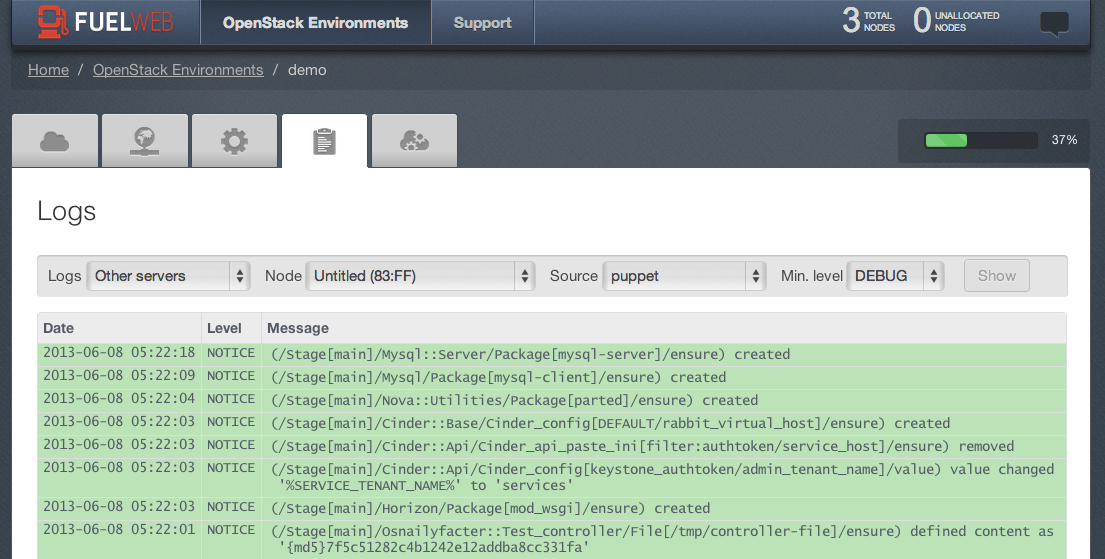
You can also go to the fourth tab of Fuel Web to see all the logs in realtime.
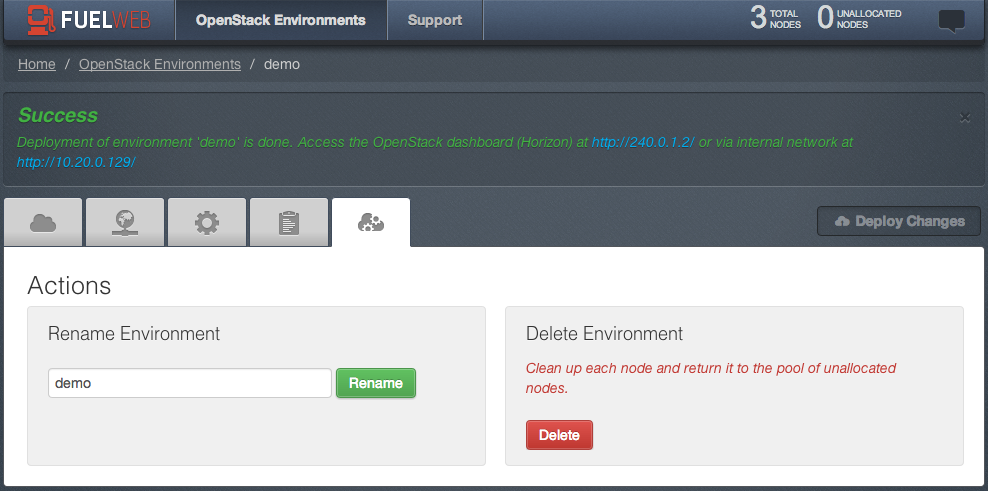
At the end of the intallation process all VMs will be rebooted to their final state and you should get the following message, if you’re lucky ;)

Vyatta
Before using your brand new cloud you need one more thing, remember you’ve configured VLANs earlier, but unfortunately VMware Fusion doesn’t support any of that. So let’s deploy a router in our lab to support this VLAN configuration. Another option would be to provision our Cloud using Fuel CLI to completly remove the VLAN dependency. Or you could also use Virtual Box which supports VLANs, by the way if know any better Fusion trick let us know in the comments.
The best known Open Source router is Vyatta. So let’s use this one to solve our issue. Go to www.vyatta.org and select Downloads
Create a new custom network name OpenStack Lab on VMware Fusion with network address 10.10.0.0/24. It will be our entry point to our Cloud.
Create a router VM with the following profile
| Vyatta VM Profile | |
|---|---|
| OS Type | Linux 64bit |
| CPU | 1 vCPU |
| Ram | 512 MB |
| Disk | 2 GB |
| Nic 1 | vmnet7 / OpenStack Lab network |
| Nic 2 | vmnet3 / public/floating network |
You can also:
- Deselect ‘split to 2GB Files’
- Remove the Soundcard
- Remove the USB Controller
- Turn off Printer Sharing
Attach the VM to your the Vyatta Iso and power it on.
Login using Vyatta/Vyatta Login/password and Type
install image
Follow the wizard, at the end of the process turn off your VM
poweroff
Power it on and configure your router with the following Workflow
show interfaces
configure
set system gateway-address 10.10.0.1
set interface ethernet eth0 address 10.10.0.2/24
set interface ethernet eth1 vif 100 address 12.0.0.1/24
set interface ethernet eth1 vif 100 address 13.0.0.1/24
commit
save
On your Mac OS you need to add the following routes to reach the Public and floating IP network
sudo route -n add 12.0.0.0/24 10.10.0.2
sudo route -n add 13.0.0.0/24 10.10.0.2
Check your setup by pinging your instance on its public net from your Mac
ping 13.0.0.102
OpenStack Horizon Dashboard
You should now be able to connect to OpenStack Horizon dashboard using the URL that you can find in the Fuel UI.
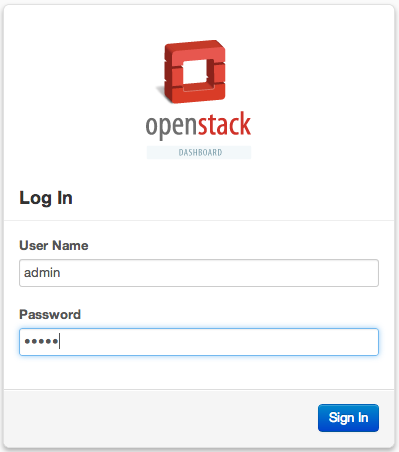
Login as admin/admin. To check everythings works as expected lets try to launch a new instance. Click on
Project > Instances > Launch Instance
and fill out the following form.
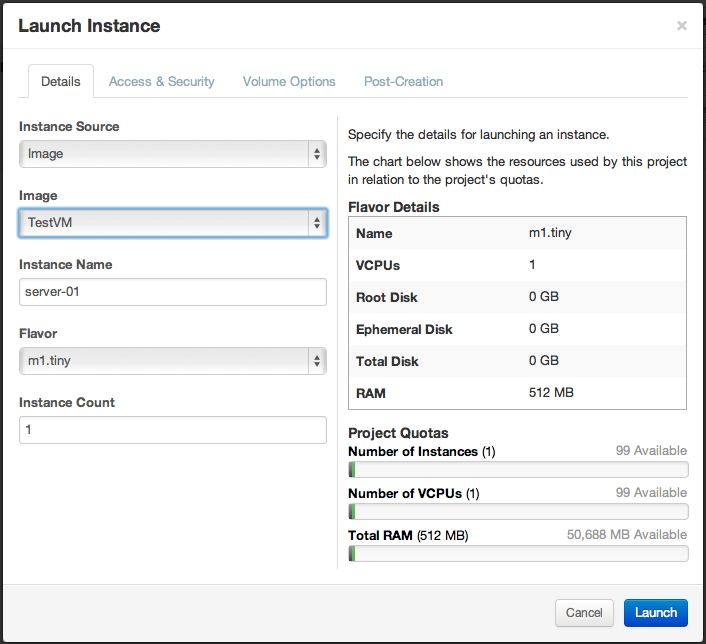
Click on Launch, you should see your little baby now active.

If you try to ping it or access the console it should work, if you are still lucky. Don’t forget to update the default security policy to allow Ping and SSH access to the instance.
Note: If your instance get an error status, there a huge probability the available resources, mostly RAM aren’t enough to provision the flavor you choosed. Prefer the tiny flavor to avoid such problems and monitor your controller syslog for provisionning error.
Floating IPs
The first instance you deploy will have no issue in getting a floating IP but strangely any other instances won’t be able to get. It seems the floating IP pool created by Fuel contain only one IP. So to resolve this issue connect to the controller node and use the following commands
nova-manage floating list
nova-manage floating create 13.0.0.100/27
nova-manage floating list
You should see a long list of available floating IP now. You’ll be able to use them up to your quota (100) from Horizon or you can also associate them from the command line :
nova floating-ip-create
nova add-floating-ip <instance> <floating-IP>
To check the floating IP is correctly bound on the target KVM host
ip addr | grep <floating-IP>
You can also check with nova
nova show <instanceID> | grep network
To connect to your instance
ssh -i nova_key.priv -o UserKnownHostsFile=/dev/null root@floating-IP
Adding an Ubuntu image
If you want more then Cirros in your catalog, you can download ready made Qcow images from the following repository.
Once you got it, upload it to your OpenStack cloud with the following commands:
wget http://c250663.r63.cf1.rackcdn.com/centos60_x86_64.qcow2
glance image-create --name="centos-6.4" --is-public=true --disk-format=raw --container-format=ovf < ./centos64-x86_64-gold-master.img
glance index
This image use root and password changeme1122 For creating your own images, you can read this article or refer to the official documentation
Note: if your instance doesn’t have an internet connection, you can suffer from slow ssh connection, just update /etc/ssh/sshd_config with
UseDNS no
GSSAPIAuthentication no
and restart the daemon with
/etc/init.d/sshd restart
Adding Compute or Cinder nodes
Fuel is great not only to deploy a cloud from bare metal but you can easily add more nodes while it’s already in production. You just need to repeat the discovery/adding process again. New nodes will be automatically installed and integrated in your running cloud. That’s really nice.
In this howto we haven’t touched on Cinder stuff, so it’s maybe a good time to add some Cinder nodes to your Cloud to see how easy it is.
Cleanup
If you want to start over due to a mistake or simply because you find it fun, you can easily unprovision everything by clicking on the actions tabs and then on the Delete button.
Conclusion
Fuel is a really nice and easy tool which abstract really well OpenStack complexity. After trying Crowbar, Devstack, Piston Enterprise OpenStack, I think Mirantis is a good contender in that space even if I find the abstraction a little bit too strong. Fuel Web as it is today is more a toy then a real deployment tool, if you need to do real work you should use the command line interface instead to get the full Fuel.
I regret there is so much discrependencies between the two options.
Stay tuned for more blog post about OpenStack deployment tools. Thanks.