PKI as a Service with Vault by HashiCorp
Creating and renewing TLS certificates is a tedious and boring task when done manually. It can be automated by using Let’s Encrypt for example but in an Enterprise environment, where you have your own CA, that’s maybe not an option any more. In this article we’ll share a workflow which leverage HashiCorp Vault to automate TLS certificate provisioning, revocation and renewal. It allows us to offer a PKI as a Service solution to our applications and users, they’ll get a self service API endpoint where they can get, renew and revoke their TLS certificates.
Introduction
To illustrate this process, I’ll use NGINX but it can be reproduced for any applications that consume certificates with a minimal amount of work. By the way you’ll find other examples on this repository.
First of all if you don’t know Vault, you can start by watching Introduction to Vault with Armon Dadgar, HashiCorp founder and Vault author and continue on with our Getting Started Guide.
Once you get familiar with Vault, you can read on.
Prerequisites
Before you can dive in this article, make sure you prepared the following:
- At least one VM to run Vault, NGINX and consul-template.
- To better mimic a production environment, Vault and NGINX + Consul-template can be run on separate VM. That’s what I’ll be doing here.
- Vault Server IP Address, referenced as
<VAULT_IP>in this article - A Fully Qualified Domain Name for your NGINX Server,
<NGINX_FQDN>, registered in your DNS
Vault Server
If you are in a hurry, setting up a Vault server for a non persistent demo is as simple as running on your Linux VM.
    $ curl -O https://releases.hashicorp.com/vault/0.11.1/vault_0.11.1_linux_amd64.zip
    $ sudo apt-get install unzip
    $ unzip vault_0.11.1_linux_amd64.zip
    $ sudo mv vault /usr/local/bin/
    $ VAULT_UI=true vault server -dev -dev-root-token-id="root"
It’s obviously not a production ready cluster, everything will be stored in memory and will be lost upon restart. Also we aren’t checking Vault binary signature to keep it short.
Now to use Vault command line interface (CLI), you need to tell your shell where to find Vault
$ export VAULT_ADDR=http://127.0.0.1:8200
Test your installation
    $ vault status
    Key             Value
    ---             -----
    Seal Type       shamir
    Sealed          false
    Total Shares    5
    Threshold       3
    Version         0.11.1
    Cluster Name    vault-cluster-ea8993ae
    Cluster ID      79c8ebbb-70e3-5398-d62a-342d98e03bcf
    HA Enabled      true
    HA Cluster      https://127.0.0.1:8201
    HA Mode         active
All looks good, your Vault server is already unsealed, because you’ve started it in development mode.
Now login using your root token
$ vault login root
Setting up PKI
Enabling PKI Secret Engine.
Vault is now ready to be configured for our PKI as a Service use case. First enable the PKI secret engine.
$ vault secrets enable pki
Root CA
For the purpose of this demo we’ll generate our own Root Certificate Authority within Vault. In a production environment, you should use an external Root CA to sign the intermediate CA that Vault will use to generate certificates. All of these steps can also be done from the Vault UI accessible at
http://VAULT_IP:8200/
You can login by just typing root in the Token field.
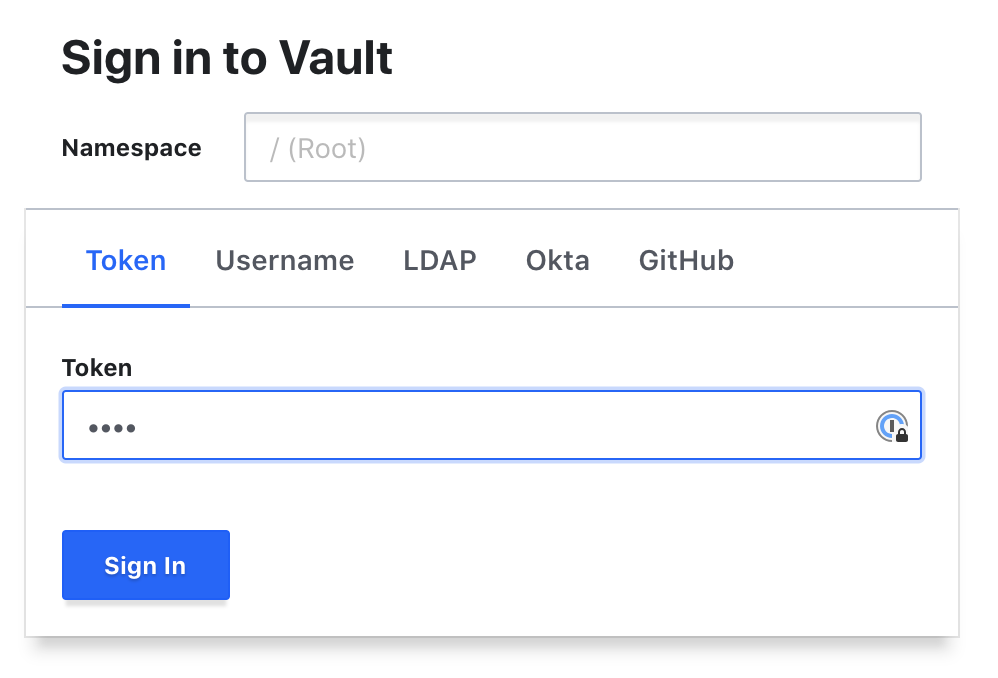
But for brevity I’ll be using command lines throughout this article. So here is the command to generate the Root CA
$ vault write -format=json pki/root/generate/internal \
 common_name="pki-ca-root" ttl=87600h | tee \
>(jq -r .data.certificate > ca.pem) \
>(jq -r .data.issuing_ca > issuing_ca.pem) \
>(jq -r .data.private_key > ca-key.pem)
You can check everything looks good from the API itself
$ curl -s http://localhost:8200/v1/pki/ca/pem | openssl x509 -text
Intermediate CA
Now that we have our Root CA ready, we can enable and configure an Intermediate CA authority at a different path. Everything relates to a PATH within Vault, so here we enable the same secret engine with a different configuration at a different PATH
$ vault secrets enable -path pki_int pki
Using a similar process as earlier, we can generate the Intermediate CA Certificate Signing Request
$ vault write -format=json pki_int/intermediate/generate/internal \
common_name="pki-ca-int" ttl=43800h | tee \
>(jq -r .data.csr > pki_int.csr) \
>(jq -r .data.private_key > pki_int.pem)
Setting up our Intermediate CA require signing our CSR using our Root CA
$ vault write -format=json pki/root/sign-intermediate \
csr=@pki_int.csr \
common_name="pki-ca-int" ttl=43800h | tee \
>(jq -r .data.certificate > pki_int.pem) \
>(jq -r .data.issuing_ca > pki_int_issuing_ca.pem)
Lastly we can inject it within our Intermediate CA configuration
$ vault write pki_int/intermediate/set-signed certificate=@pki_int.pem
PKI Role
Congrat, you’re almost done. You now have to create a role, which will be used by Certificates consumers
$ vault write pki_int/roles/yet-dot-org \
          allow_any_name=true \
          max_ttl="2m" \
          generate_lease=true
Feel free to change the role name yet-dot-org to reflect the domain for which this role will generate certificates.
allow_any_name=true permit to generate certificates for any domain name, if you prefer you can use other options like allowed_domains, allow_subdomains, allow_glob_domains, see our documentation for details.
Funily enough for the purpose of our demo, we will be renewing our certificates every two minutes, max_ttl=2m. It’s a bit extreme, but it illustrate well the power of automation, once this process is automated, you’re free to renew your certificates as much as you want, which radically increase the security of your environment.
By providing the argument generate_lease=true we enable our capability to easily revoke certificates by using the lease ID returned upon Certificate creation.
PKI ACL
We need to allow our clients to generate their own certificate, so lets create a Vault Access Control List (ACL) for that, here it is
    $ vi pki_int.hcl

    path "pki_int/issue/*" {
      capabilities = ["create", "update"]
    }

    path "pki_int/certs" {
      capabilities = ["list"]
    }

    path "pki_int/revoke" {
      capabilities = ["create", "update"]
    }

    path "pki_int/tidy" {
      capabilities = ["create", "update"]
    }

    path "pki/cert/ca" {
      capabilities = ["read"]
    }

    path "auth/token/renew" {
      capabilities = ["update"]
    }

    path "auth/token/renew-self" {
      capabilities = ["update"]
    }

    $ vault policy write pki_int pki_int.hcl
PKI Revocation configuration
In this demo we’ll also demonstrate the workflow to revoke TLS Certificates, so lets configure CRL location and issuing certificates
    vault write pki_int/config/urls \
      issuing_certificates="http://<VAULT_IP:8200>/v1/pki_int/ca" \
      crl_distribution_points="http://<VAULT_IP:8200/v1/pki_int/crl"
Lower the expiration delay of your Certificate Revocation List not to have to wait to long to see an update, to do so first create the following payload
    $ vi expiration.json
    {
     "expiry": "2m"
    }
Now inject this payload thu the Vault API
    curl \
        --header "X-Vault-Token: root" \
        --request POST \
        --data @expiration.json \
        http://<VAULT_IP:8200>/v1/pki_int/config/crl
If you aren’t running Vault in development mode, replace root above by your root token. Obviously it’s not secure to have this command stored in your shell history, you can prevent that by starting your command by a space and by adding the following option to your shell
setopt HIST_IGNORE_SPACE
PKI Token Access
In this last step on the Vault side, you’ll be generating an access token which will be used by our NGINX server to authenticate itself to Vault. It’s the most basic way to authenticate. We could have used different auth backends, like Google Cloud Auth backend but that’s not the focus of this demo.
So let’s keep it simple and generate a token which we associate with the policy created earlier:
$ vault token create -policy=pki_int -ttl=24h
Key                  Value
---                  -----
token                7PEv0FxJmdFyu0FQbsXzIXwi
token_accessor       71MSF8PSUP03sw9h5GpxP7cv
token_duration       24h
token_renewable      true
token_policies       ["default" "pki_int"]
identity_policies    []
policies             ["default" "pki_int"]
You can now login using this token
$ vault login 7PEv0FxJmdFyu0FQbsXzIXwi
Success! You are now authenticated. The token information displayed below
is already stored in the token helper. You do NOT need to run "vault login"
again. Future Vault requests will automatically use this token.

Key                  Value
---                  -----
token                7PEv0FxJmdFyu0FQbsXzIXwi
token_accessor       71MSF8PSUP03sw9h5GpxP7cv
token_duration       23h59m49s
token_renewable      true
token_policies       ["default" "pki_int"]
identity_policies    []
policies             ["default" "pki_int"]
Take note of this token, you’ll need it later.
Generate your first Certificate
It’s now time to check that everything looks good by generating our first TLS Certificate, with the command below
$ vault write pki_int/issue/yet-dot-org common_name=<NGINX_FQDN>
You should get back a certificate for your NGINX FQDN, not shown here for the sake of brevity.
Hurrah !!! The beauty of this self service environment, it can serve as many certificate as you may need, simply by using the vault write pki_int/issue/yet-dot-org command.
Consul-template
Everything is now ready to be automated. Consult Template is a nice tool which can generate files based on information coming from Consul and/or Vault. In our case we’ll use it to automatically generate and renew TLS certificates.
Consul Template is the glue between our NGINX and our Vault, it’s a long running process which will act before the end of our Certificate Time to Live (TTL) to automatically renew our certificate. Handy isn’t it.
Installation
Log to the other Linux server that you plan to use as an NGINX server or stay where you are if you have only one VM !
First install Vault binary, see the introduction for the detailed steps.
Now install Consul Template binary
$ wget https://releases.hashicorp.com/consul-template/0.19.5/consul-template_0.19.5_linux_amd64.zip
$ apt-get install unzip
$ unzip consul-template_0.19.5_linux_amd64.zip
$ mv consul-template /user/local/bin
Consul Template is also available for MacOS, freebsd, netbsd, openbsd, solaris, windows.
Configuration
On the machine where you plan to install NGINX, create a directory to store your Consul Template configuration which should look like this
$ mkdir /etc/consul-template.d/; cd /etc/consul-template.d/
$ vi pki-demo.hcl

vault {
  address = "http://<VAULT_IP>:8200"
  renew_token = true

  retry {
    enabled = true
    attempts = 5
    backoff = "250ms"
  }
}

template {
  source      = "/etc/consul-template.d/yet-cert.tpl"
  destination = "/etc/nginx/certs/yet.crt"
  perms       = "0600"
  command     = "systemctl reload nginx"
}

template {
  source      = "/etc/consul-template.d/yet-key.tpl"
  destination = "/etc/nginx/certs/yet.key"
  perms       = "0600"
  command     = "systemctl reload nginx"
}
Replace above <VAULT_IP> by the IP of your VAULT server or you can use active.vault.service.consul if your server is configured to forward resolution of .consul domain to your consul cluster. It’s an easy way to always get the IP Adress of your active vault node in your cluster.
If you’re running Vault from your laptop, you can make it externally accessible to your NGINX server using
$ ngrok http 8200
Before going to the next step create the directory where Consul Template will generate NGINX Certificates
$ sudo mkdir /etc/nginx/certs
Templates
Now we need to create our two templates: yet-cert.tpl and yet-key.tpl which will be used by consul-template to generate NGINX TLS stuff.
$ vi /etc/consul-template.d/yet-cert.tpl

{{- /* yet-cert.tpl */ -}}
{{ with secret "pki_int/issue/yet-dot-org" "common_name=<NGINX_FQDN>"     "ttl=2m" }}
{{ .Data.certificate }}
{{ .Data.issuing_ca }}{{ end }}

$ vi /etc/consul-template.d/yet-key.tpl

{{- /* yet-key.tpl */ -}}
{{ with secret "pki_int/issue/yet-dot-org" "common_name=<NGINX_FQDN>" "ttl=2m"}}
{{ .Data.private_key }}{{ end }}
Just replace above <NGINX_FQDN> by the fully qualified name of your NGINX server.
To generate certificates, Consul Template just target Vault API, specifically the pki_int/issue/yet-dot-org PATH, which is using the Role created earlier.
Systemd configuration
We’ll end up this part by setting up the required Systemd service to ensure Consult Template will be run automatically as a daemon at reboot.
$ vi /etc/systemd/system/consul-template.service

[Unit]
Description=consul-template
Requires=network-online.target
After=network-online.target

[Service]
EnvironmentFile=-/etc/sysconfig/consul-template
Restart=on-failure
ExecStart=/usr/local/bin/consul-template $OPTIONS -config='/etc/    consul-template.d/pki-demo.hcl'
KillSignal=SIGINT

[Install]
WantedBy=multi-user.target
Reload, enable and start Consul Template service
$ systemctl daemon-reload
$ systemctl enable consul-template.service
$ systemctl start consul-template.service
Check if it running well ?
$ systemctl status consul-template.service
$ journalctl -u consul-template.service -f
NGINX
Lets deploy a NGINX server on a Linux VM, you can deploy it on the same machine as your Vault server to reduce the footprint of your demo
$ sudo apt-get install nginx
Make sure you allow traffic from this instance to vault on port 8200.
Configuration of your nginx should look like this
$ vi /etc/nginx/sites-available/pki-demo

# redirect traffic from http to https.
server {
listen              80;
listen              [::]:80;
server_name         <NGINX_FQDN> www.<NGINX_FQDN>;
return 301          https://<NGINX_FQDN>$request_uri;
return 301          https://www.<NGINX_FQDN>$request_uri;
}

server {
    listen              443 ssl http2 default_server;
    server_name         <NGINX_FQDN> www.<NGINX_FQDN>;
    ssl_certificate     /etc/nginx/certs/yet.crt;
    ssl_certificate_key /etc/nginx/certs/yet.key;
    ssl_protocols       TLSv1 TLSv1.1 TLSv1.2;
    ssl_ciphers         HIGH:!aNULL:!MD5;

    location / {
      root   /usr/share/nginx/html;
      index  index.html index.htm;
    }
}
Just replace above <NGINX_FQDN> by the fully qualified name of your NGINX server.
Enable your web site and remove default one.
$ ln -s /etc/nginx/sites-available/pki-demo /etc/nginx/sites-enabled/pki-demo
$ rm /etc/nginx/sites-enabled/default
That’s all for now on on NGINX.
Importing Issuing CA Root to Chrome
For your demo, it could be a good idea to import your Issuing CA to your browser to avoid the annoying message saying that your certificate isn’t trusted. To do so, first get the Root Certificate pem file
$ curl -s http://<VAULT_IP>:8200/v1/pki/ca/pem > pki_ca.pem
If you use Chrome, you can now import it from chrome://settings/ go to Advanced and then under Privacy and Security click Manage Certificates
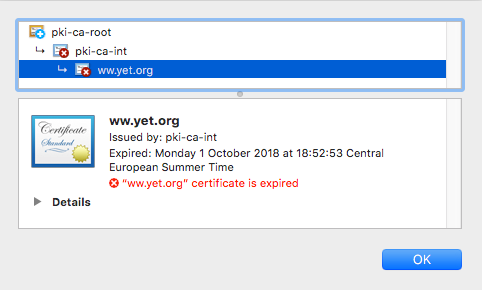
On MacOS it will use the operating system certificate management, you then just have to unlock access to import pki_ca.pem, and trust it.
Now if you reload the page served by NGINX you should only get an alert regarding the expiration of the certificate if it has expired, or no alert if it is still valid.
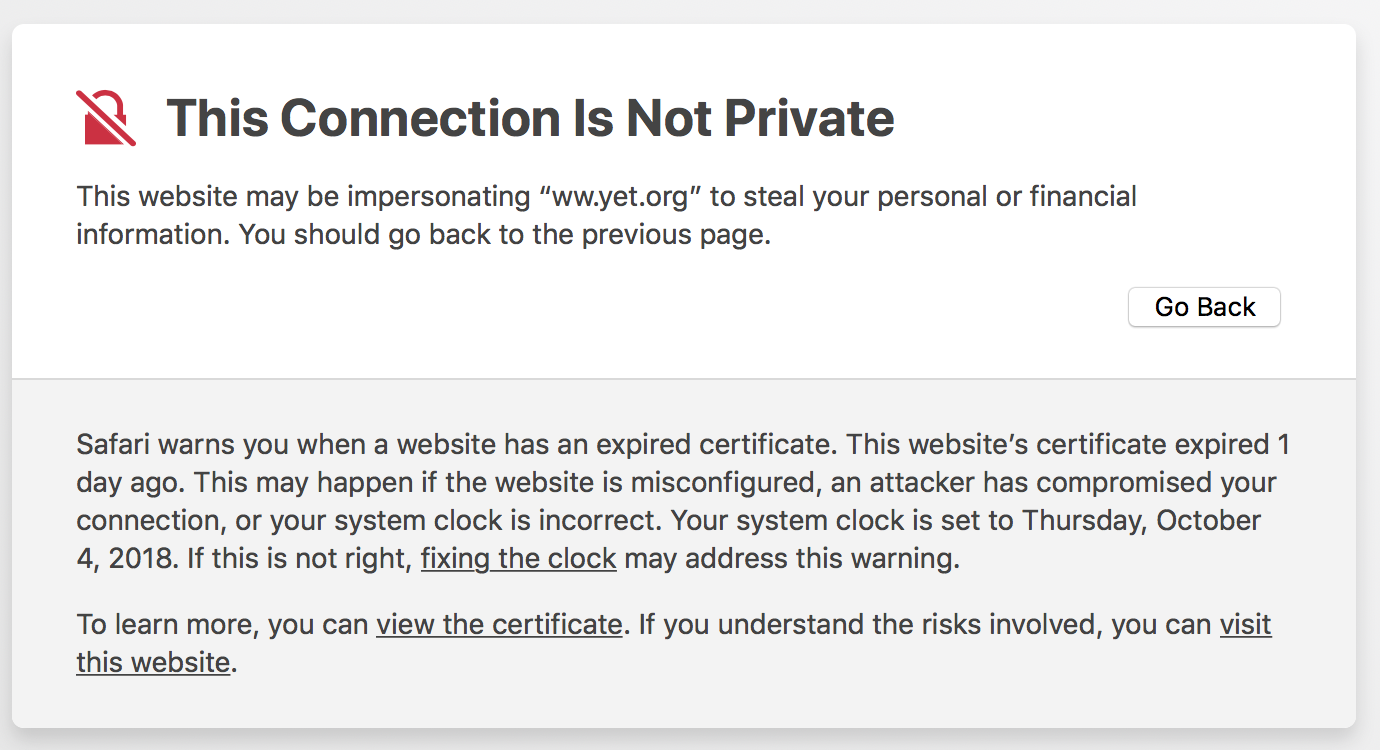
But if you wait 2 minutes (Certificate TTL), it will expire, you should see the following message.
Demo Preparation
Behind the scene, prepare three splited shell windows using iTerm2 on MacOS or any similar capable terminal.
On the first window connect to your NGINX server and authenticate to Vault using the token created earlier
$ sudo su
# export VAULT_ADDR='http://<VAULT_IP:8200>'
# vault login 2rQcipOy5TW4epqQqvUjyNjV
Our token is only valid for 24h but Consul Template will take care of renewing it.
There are plenty of ways to introduce this required secret to our NGINX server, but it is currently out of scope.
Continue on by making sure you’ve stopped Consul Template service on your NGINX server and let the certificate expire after 2 minutes:
# systemctl stop consul-template.service
On the second window connect to your Vault Server to list existing certificates
$ export VAULT_ADDR='http://<VAULT_IP:8200>'
$ vault login 2rQcipOy5TW4epqQqvUjyNjV
$ watch vault list pki_int/certs
On the third one, from any machine which can access your NGINX server, run the following command to check nginx certificate status
$ watch -n 5 "curl --cacert <PATH>/pki_ca.pem --insecure -v https://<NGINX_FQDN> 2>&1 | awk 'BEGIN { cert=0 } /^\* SSL connection/ { cert=1 } /^\*/ { if (cert) print }'"
Replace <PATH>/pki_ca.pem by the location where you saved your pki_ca.pem file earlier and <NGINX_FQDN> by your NGINX server domain name.
This is what you should see on your three terminal windows
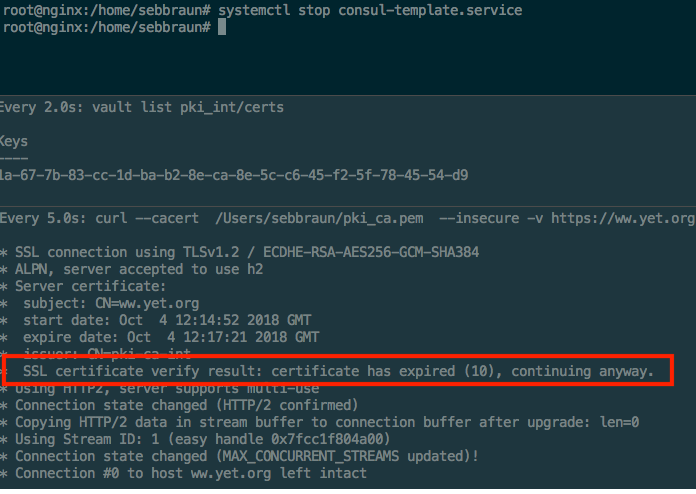
NGINX current certificate has expired.
Lastly open Chrome on your nginx server
https://www.<NGINX_FQDN>
Chrome should tell you
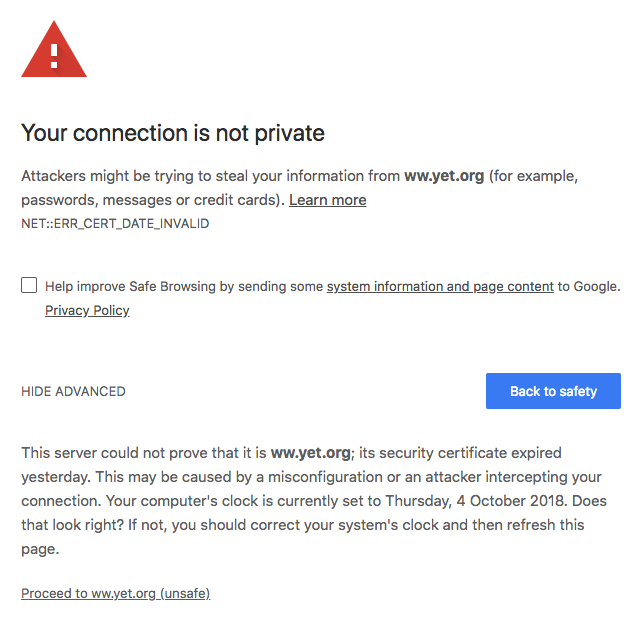
Safari is also unhappy
Demo Workflow
Everything is now ready for the real deal !!!
Share how everything were put in place together.
Before sharing how simple it is to renew our Certificate, explain the relationship between Vault, Consul Template and NGINX. Show some of the templates.
Certificate Renewal
As we’ve seen above, our certificate has currently expired. So lets start our auto renewal process on the first terminal window
# systemctl start consul-template.service
You can now check the status again on the third terminal window
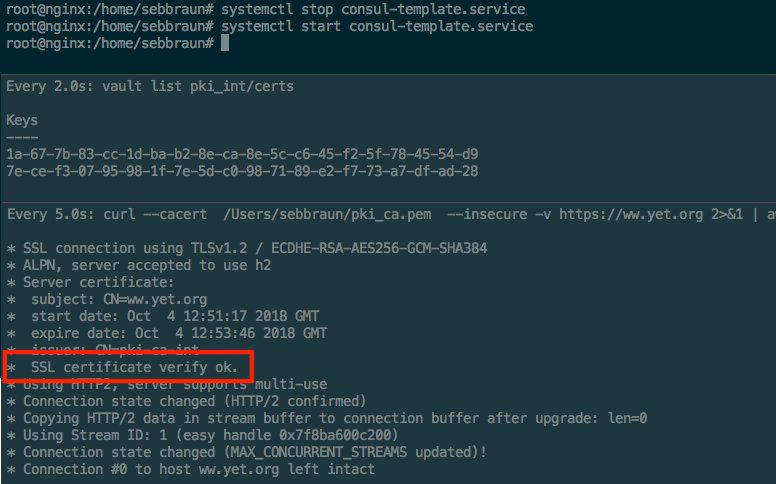
Great, everything works as expected, our Certificate has been renewed, and if you wait 2 more minutes, you’ll see that renewal will take place again automatically !!! Look at the growing list of certificates in our store in our second window.
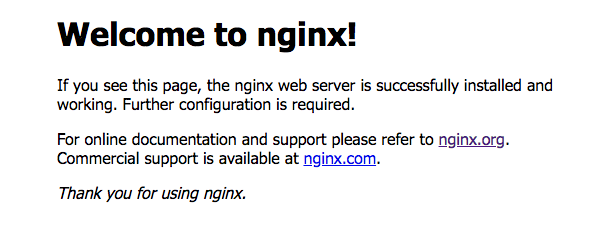
Chrome and Safari are now both happy, our web site shows without any warning.
Certificate Revocation
Lastly you can also demonstrate how easy it is to revoke any of the certificate that Vault generated.
Stop the command currently running on the third shell window and run instead
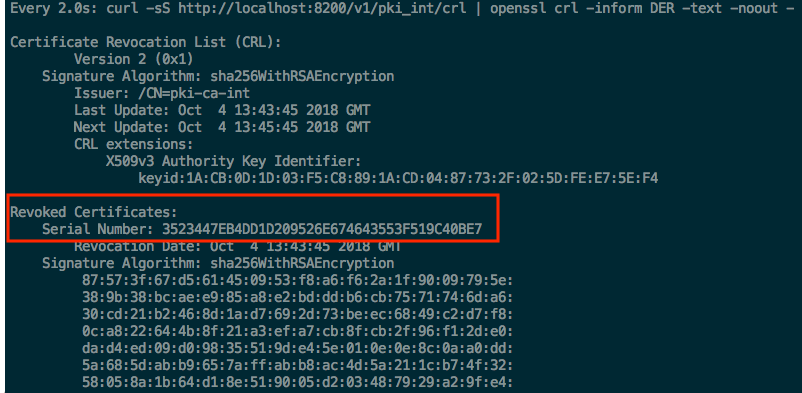
watch "curl -sS http://<VAULT_IP:8200>/v1/pki_int/crl | openssl crl -inform DER -text -noout -"
This command shows the current status of the Certificate Revocation List published by Vault. We currently have no revoked certificates.
You can revoke any existing certificate by its serial number that you see on the second shell window, to do so copy and paste its serial number.
And run the following command in the first shell window
    vault write pki_int/revoke \
      serial_number="35-23-44-7e-b4-dd-1d-20-95-26-e6-74-64-35-53-f5-19-c4-0b-e7"
Third window should now show that a certificate has been revoked
If that’s not the case, you may have made a mistake while configuring your CRL expiration or URLs check it again, you can also try to force a rotation.
    curl \
      --header "X-Vault-Token: root" \
      http://<VAULT_IP:8200>/v1/pki_int/crl/rotate
This is the end of the demo ! If you’ve reached that stage, I’m grateful :)
Demo Cleanup
If you don’t want your Vault server to be cluttered with certificates generated every two minutes, you should now stop Consul Template service
$ sudo systemctl stop consul-template.service
Expired and revoked Certificates can be cleared out from the Vault store with the following command
$ vault write pki_int/tidy \
    safety_buffer=5s \
    tidy_cert_store=true \
    tidy_revocation_list=true
You can also disable the two PKI Secret Engine that you’ve enabled
$ vault secrets disable pki
$ vault secrets disable pki_int
Lastly you can revoke the created token
$ vault token revoke 2rQcipOy5TW4epqQqvUjyNjV
Conclusion
Once you have Vault setup for your domains with the different roles necessary for your organisation, it is trivial to automate the distribution and renewals of TLS Certificates. It becomes a TLS zero touch environment.
In my day to day life as a Solutions Engineer at HashiCorp in Europe, I’ve encountered lots of customers that are suffering from manual renewal of their PKI infrastructure. That motivated me to share this PKI as a Service step by step guide, I hope you find it useful.
Links
- Vault documentation
- Vault PKI Secret Engine
- Vault guides
- Katacoda labs