NSX vSphere 6.1.3 on vSphere 6
VMware released on march 23rd NSX-v 6.1.3 which now support vSphere 6.0. I was waiting for this release to upgrade my Bulb lab to the latest and greatest, so here am I. In this article, I’ll describe the upgrade process. I’ll start by upgrading NSX to 6.1.3 and continue on by upgrading vCenter Appliance to 6.0. I’m eager to get the latest improvement that both vSphere 6.0 and NSX 6.1.3 offers.
Upgrade Process Overview
- Download all the required components
- Upgrade NSX Manager
- Upgrade NSX Controllers
- Upgrade Clusters
- Upgrade NSX Edges
- Upgrade vCenter Server Appliance to 6.0
Download all the required components
First download all the required components from myvmware portal:
- NSX 6.1.3 upgrade bundle (2.46 Go) - MD5SUM a92d01a6288c633b9afc6145bb26574c
- vCenter Appliance (2.86 Go) - MD5SUM 8a10192ad4e46ae88d79b37a539ee38c
- ESXi 6.0 Installer (365 Mo) - MD5SUM 478e2c6f7a875dd3dacaaeb2b0b38228
Make sure all the MD5SUM match each of your local file, if it doesn’t match, check the MD5SUM on the VMware Portal again. It may have changed with a new build.
Upgrade NSX Manager to 6.1.3
Before updgrading your environment make sure to check the release notes for any known issues that could impact your environment. It’s also a good idea to take a snapshot of your NSX Manager in case anything goes wrong.
I’m making the assumption that your platform is currently running NSX 6.x and not vCNS, consult the official documentation if that’s not your case.
Now connect to your NSX Manager Web UI
http://ManagerIPAddress/
Authenticate using your NSX Manager admin credentials
Click on Upgrade
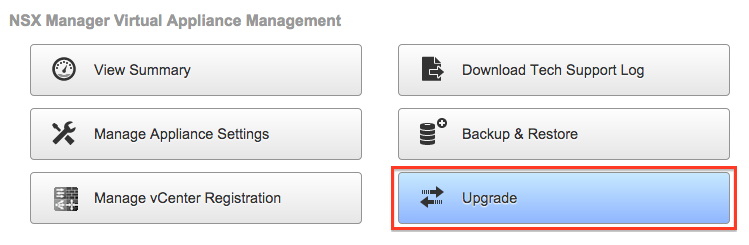
Click on Upgrade again

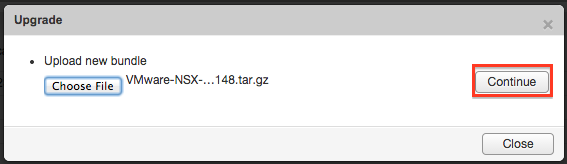
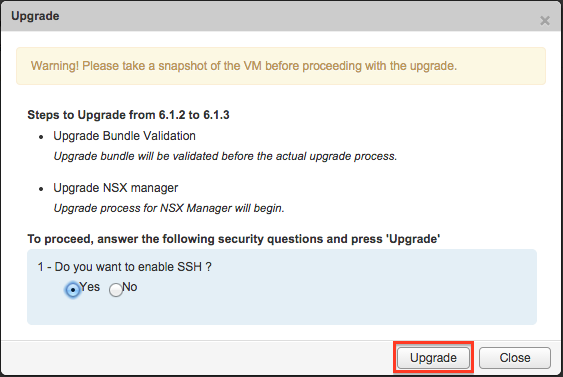
I’m currently running 6.1.2 build number 2318232. In the popup window that came up, you can now select the upgrade bundle that you’ve downloaded in the previous step. Make sure the file kept its original .tar.gz extension, some browser automatically decompress files. You can then click on Continue.
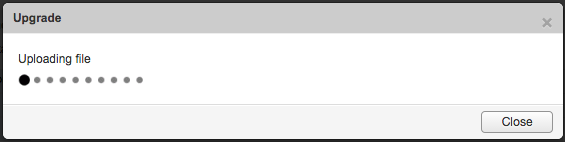
The process will start by uploading the upgrade bundle.
After a while you can choose wether or not you allow SSH and click Upgrade
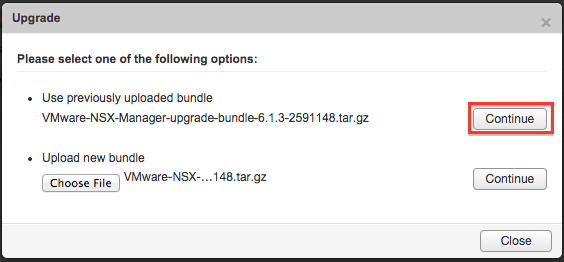
Click Continue in front of the Use Previously … line
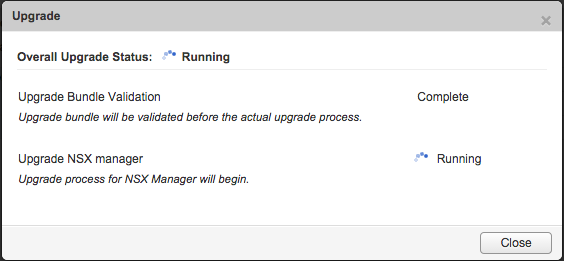
Wait until the upgrade process complete.
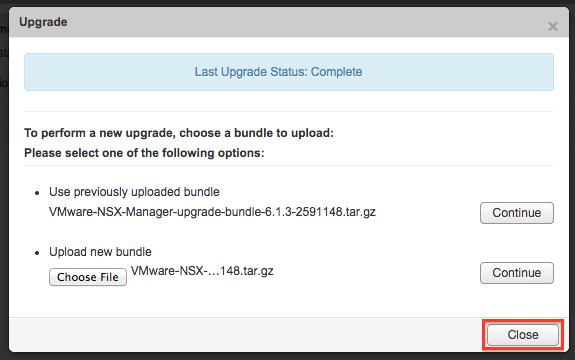
It’s now complete, you can close the window.
Wait until the NSX Manager VM terminate rebooting, and login again to its Web UI. The version is now 6.1.3 build number 2591148. As you can see below most of the NSX Manager services are already running apart from the NSX Management Services. So wait until it’s indicated as Running.
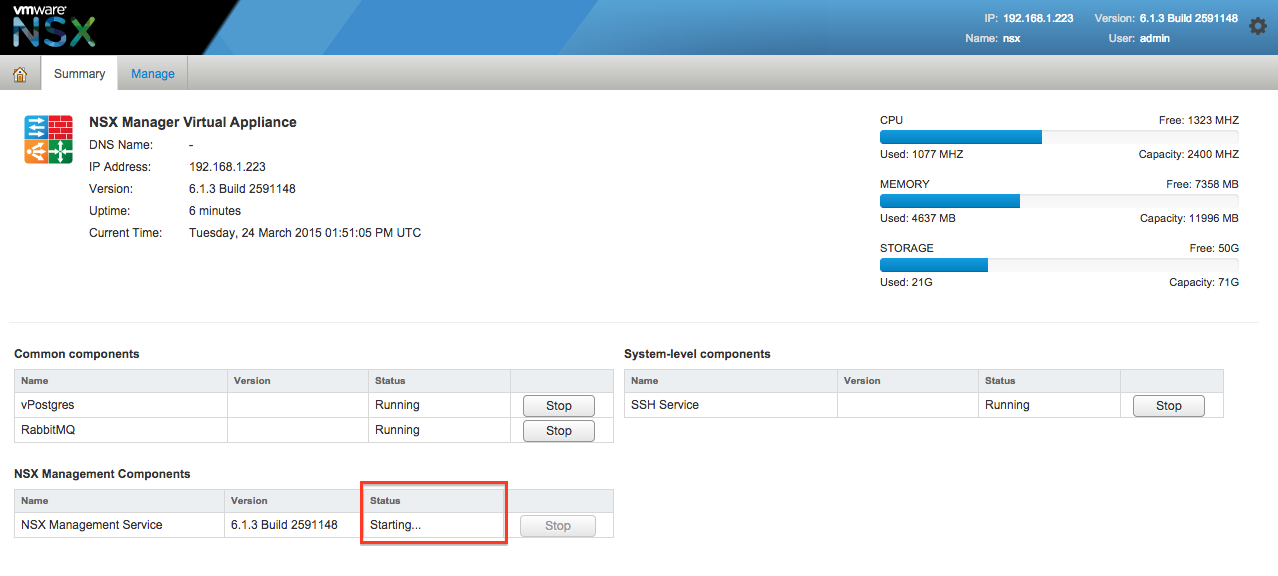
It’s now running, NSX Manager 6.1.3 is fully operational.

Upgrade NSX Controller
Before starting this process, it’s a good idea to backup each controller data using the following API REST Call, you can get the controllerID in the Name column of the Installation pane of NSX Web UI.
GET https://NSXManagerIPAddress/api/2.0/vdn/controller/controllerID/snapshot
And then to download the data
curl -u admin:default -H "Accept: application/octet-stream" -X GET -k https://NSXManagerIPAddress/api/2.0/vdn/controller/controllerID/snapshot > controller_backup.snapshot
Now reconnect to your vSphere Web UI, and reach the NSX Installation menu, you should see a message saying Upgrade Available, click on it.

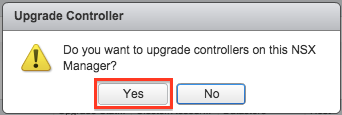
Confirm that you really want to upgrade your controllers by clicking on Yes
Controllers are now starting the upgrade process

they download the upgrade file

and finish the process by rebooting

It should end with a green status running version 6.1.41894, which confirm controllers are now running the latest version.
Note: My environment is using only one NSX controller, production environment require three of them instead.

Cluster and Logical Switches.
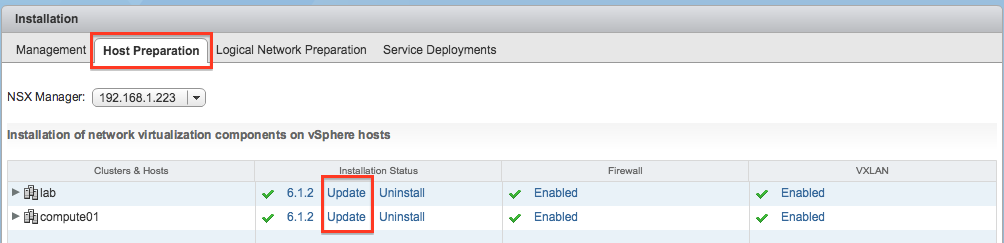
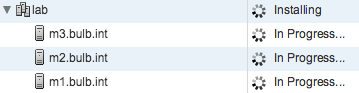
Now click on Host Preparation and click Update for each cluster you want to upgrade.
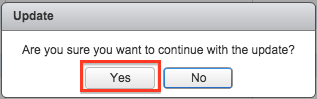
For the upgrade to be seamless, you have to have enough capacity in each cluster to evacuate VM’s from the host being upgraded. It will be rebooted, which is required to upgrade the kernel modules. You now have to confirm that you really want to do the upgrade.
Installation is now in progress.
If some cluster shows an error, you can click Resolve to retry the installation.

If you get a Not Ready message click on the red icon to display the error message
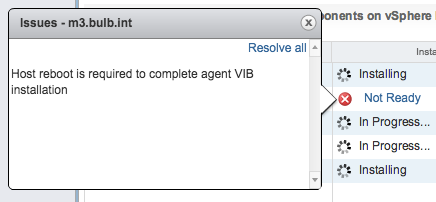
As you can see rebooting the host is required. You can also see this requirement in the host inventory
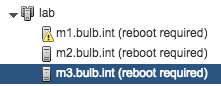
If some of your hosts require a manual reboot, put them in maintenance mode and reboot the required ones, one by one to prevent any downtime. It’s even more important to give each host time to reboot and come back alive if you’re using Virtual SAN !!!
At the end of the upgrade process each host should be upgraded to 6.1.3 and in ready state.

Upgrade NSX Edges
Almost there, you still have to upgrade the deployed NSX Edges. From the NSX Edge menu, right click on the edges to upgrade them.
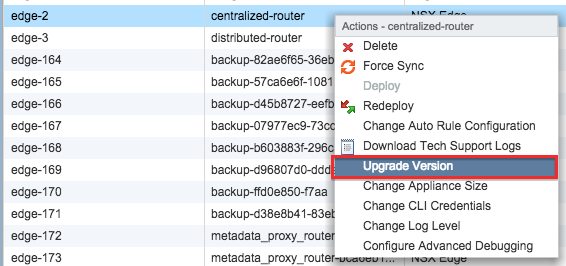
When the process finish, you can check in the list your edge is running the lastest version.

Upgrade vCenter Appliance to 6.0
I presume most of you are using the vCenter Server appliance, if that’s not the case you should consult the official documentation to review the upgrade steps for vCenter on Windows. Before jumping in, it’s a good idea to read the pre-requisites.
Beware, to upgrade your vCenter Server Appliance, you can only do it from the newly release integration Plug-In found on the vCenter Server Appliance ISO. So you first have to install this integration Plug-In on a Windows OS.
vCenter Server Appliance (vCSA) can only be deployed on ESXi hosts 5.1 and above.
This upgrade process is only possible if you’re using an embedded vCenter Single Sign-On.
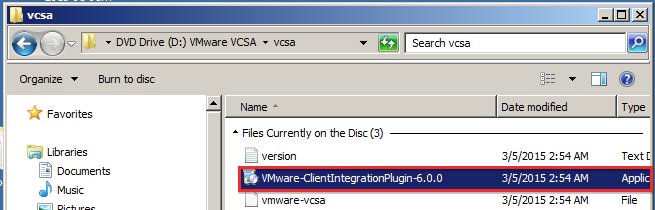
Ok, after all these warnings, if you comply, you can mount the ISO to the Windows VM which will be used to upgrade vCSA. Navigate to the vcsa directory and launch VMware-ClientIntegrationPlugin–6.0.0.
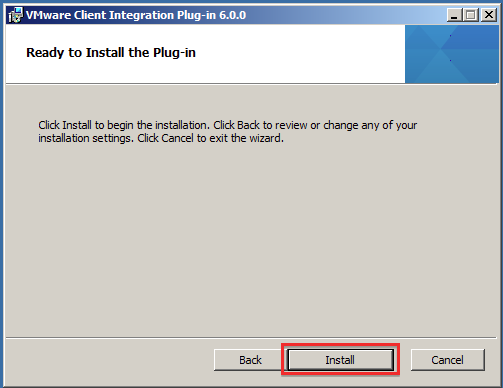
Click Next, accept the Licence Agreement, choose the Destination Folder. and click Install.
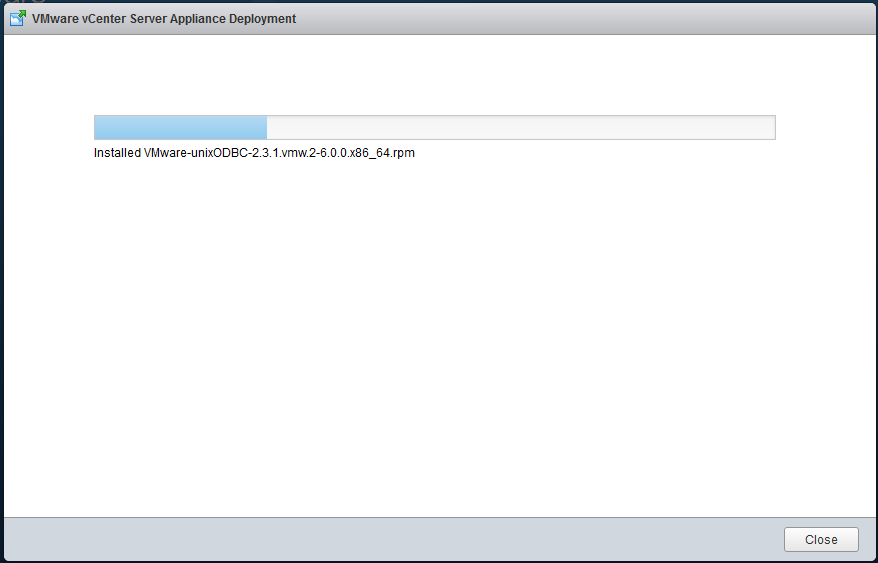
When it’s done, you can click Finish. It’s now a good time to take a snapshot of your existing vCenter Server Appliance. Once it’s done you can start the upgrade process itself by double clicking vcsa-setup.html found at the root of the vCSA ISO.
Note: If the integration plugin isn’t detected, make sure you have write capability to the Users\%USER%\AppData\Local\VMware\ directory, you should also check proxy settings and make sure all Windows updates are installed.
If you’re curious, the integration plugin installation add a line in your /Windows/System32/DRIVERS/etc/hosts to resolve vmware-localhost as 127.0.0.1. The vcsa-setup.html that you’ve launched connect using a websocket to wss://vmware-localhost:8093. Some security solution could prevent this from happening. If the plugin isn’t detected, check your browser console to see if the connection is successful.
In my case I just had to change ownership and gave write permission recursively to file under %AppData%\..\Local\VMware\CIP\csd\ to the user which was running the all thing.
For more troubleshooting tips consult the release notes.
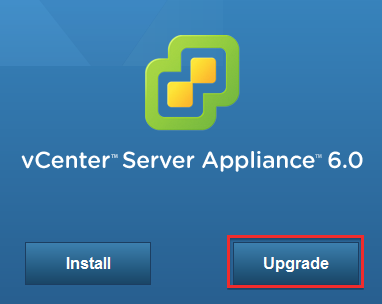
If everything works as expected, you should now see a screen asking if you want to install or upgrade, click on Upgrade.
Follow the vCSA 6.0 upgrade wizard to upgrade your existing vCenter Server Appliance. It will install a new vCenter VM and copy over the configuration from your existing one.
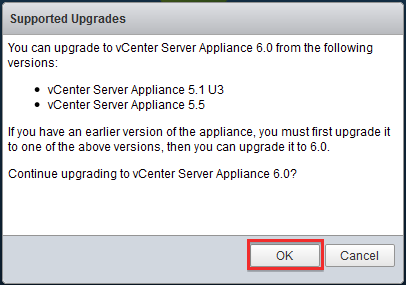
After checking you’re running a supported version (5.1 U3 or 5.5) you can click OK.
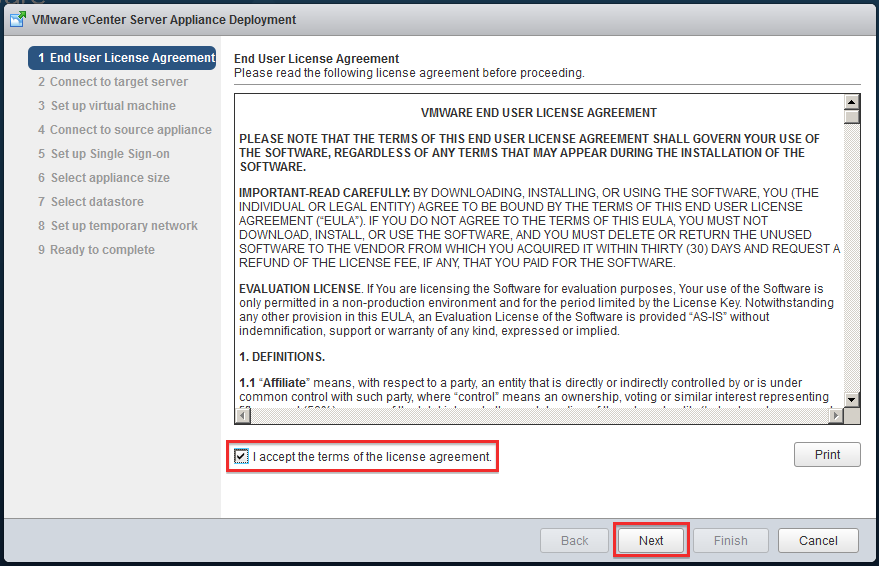
Accept the License Agreement and click Next
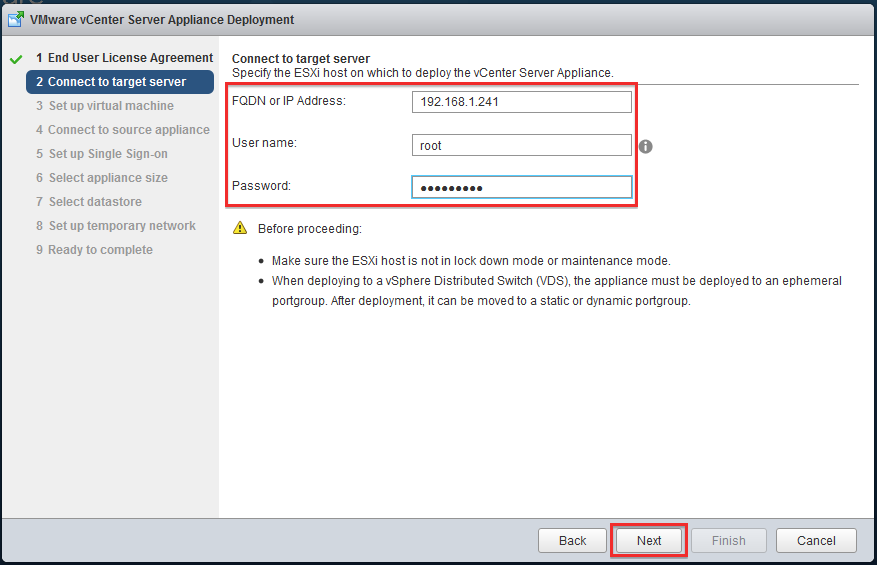
Specify the target host where to deploy vCSA 6.0 appliance, and input host credentials. Click Next.
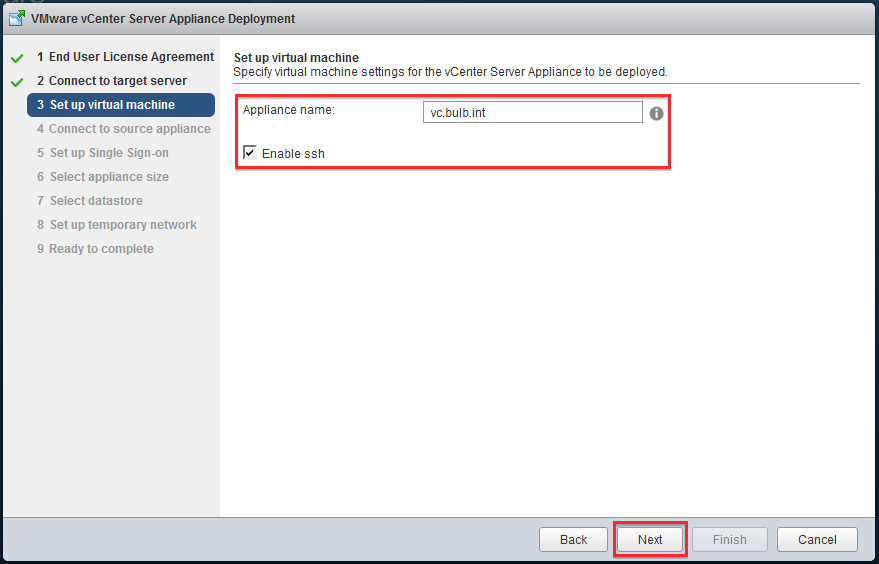
Input your vCSA appliance name, you can also enable SSH.
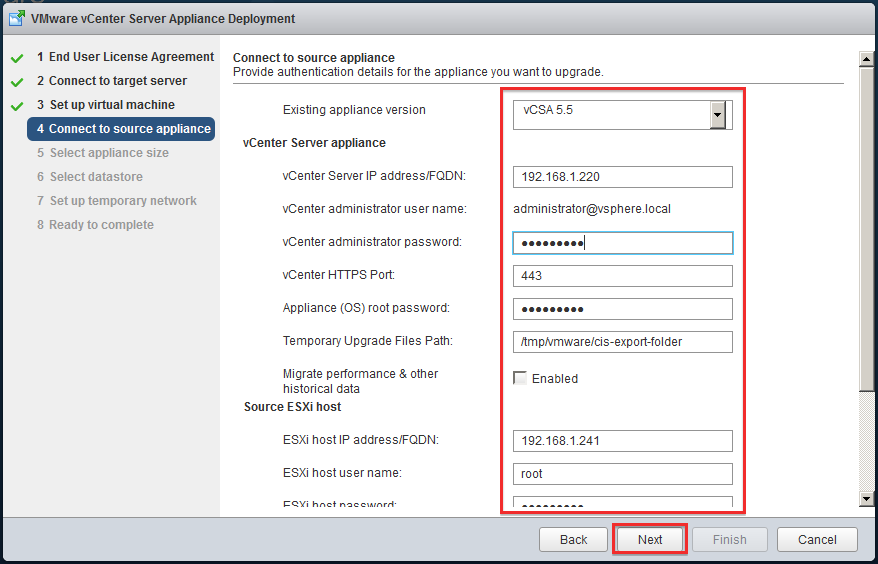
Select the correct version of your existing vCenter Server Appliance and specify all the required information to access it: IP, credentials, source host, …
Select your appliance size, I’m using a tiny size which will consume 8GB of RAM, it’s the bare minimum.

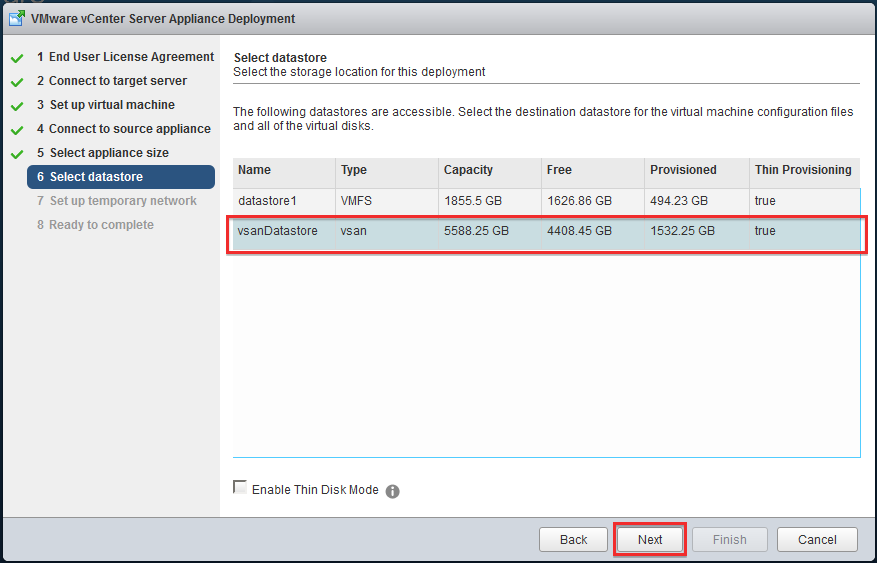
Select the target datastore, I’m using a vSAN one here :) I’m not enabling Thin Disk Mode because I have plenty of storage available, but you may have to activate it if you are sparse on ressources.
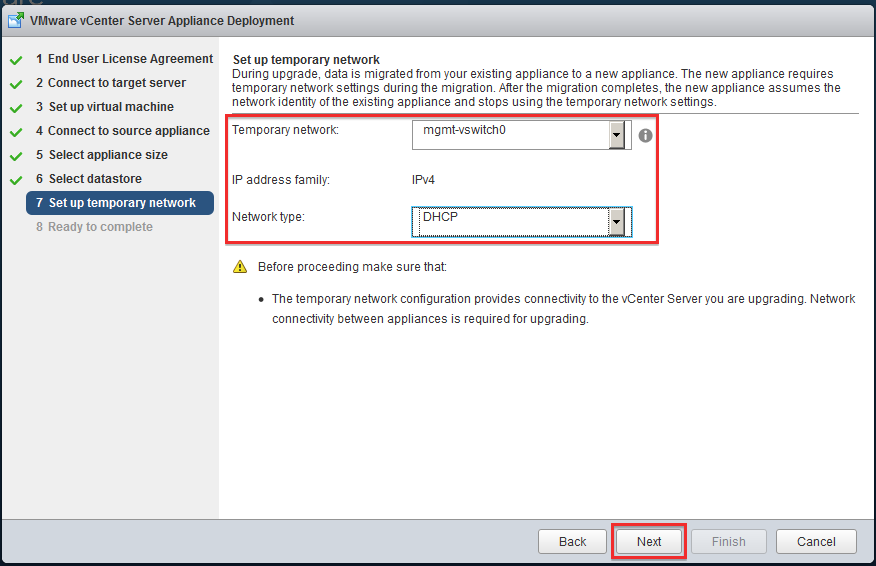
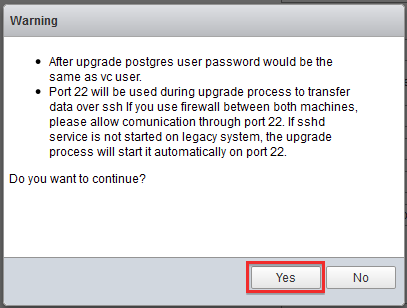
Make sure you select a network on which you’ll be able to communicate thru port 22 with your existing vCenter Server Appliance.
Review everything and click Finish to start deployment.
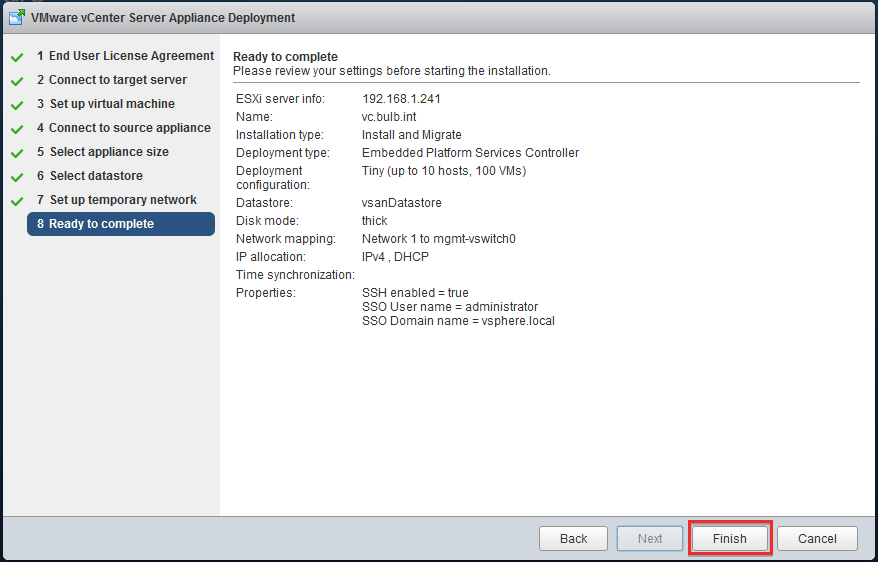
Last chance to cancel before vCSA deployment starts
It’s time for a Tea, maybe two ;)
Migration of all the configuration data is now done, the old vCenter Server Appliance is now powered down, and you should have access to a brand new vCSA 6.0. Access it using the IP Address assigned to the previous vCSA.
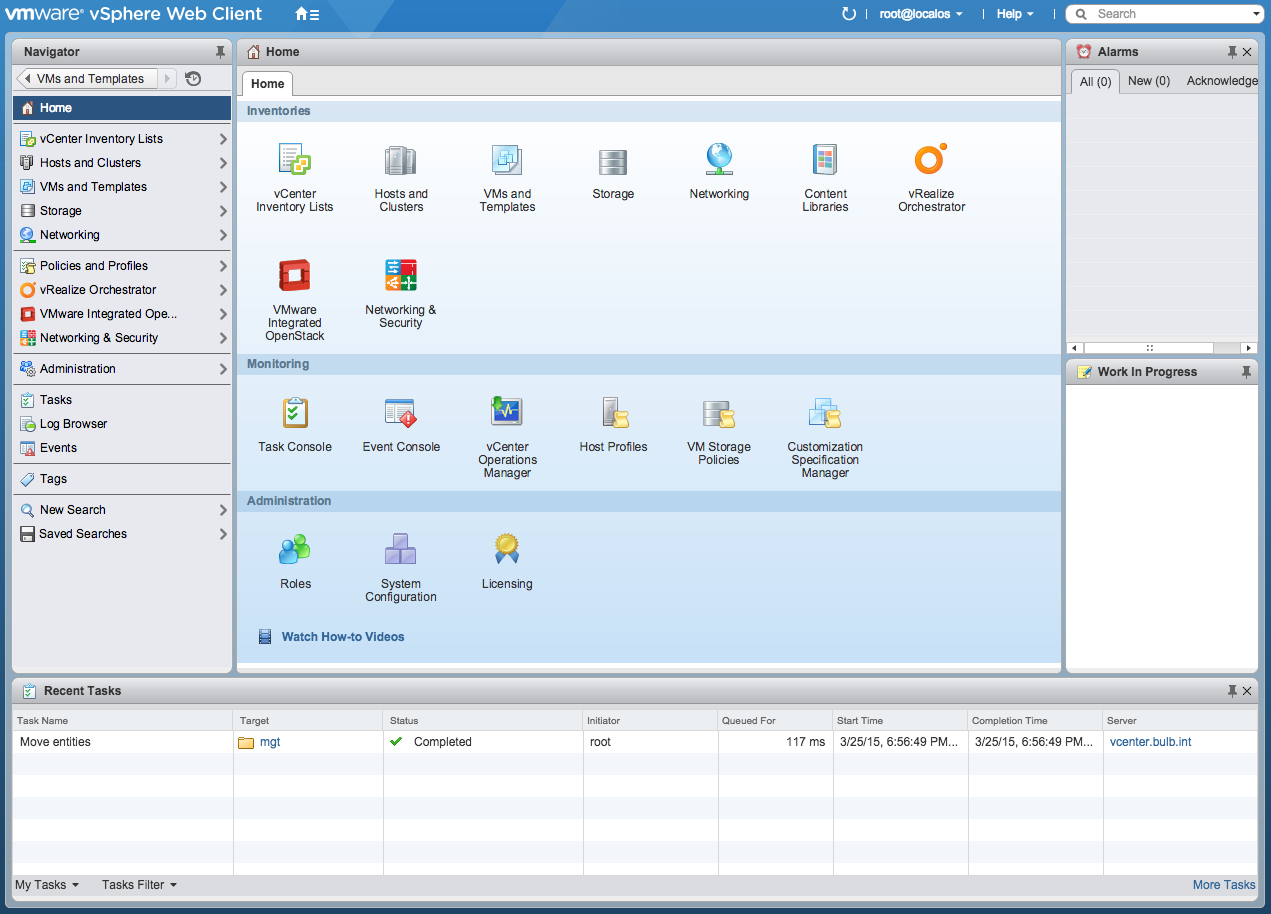
Let me introduce you to vCenter 6.0 Web UI with a nice Recent Tasks at the bottom, great !!! It’s also much more responsive :)
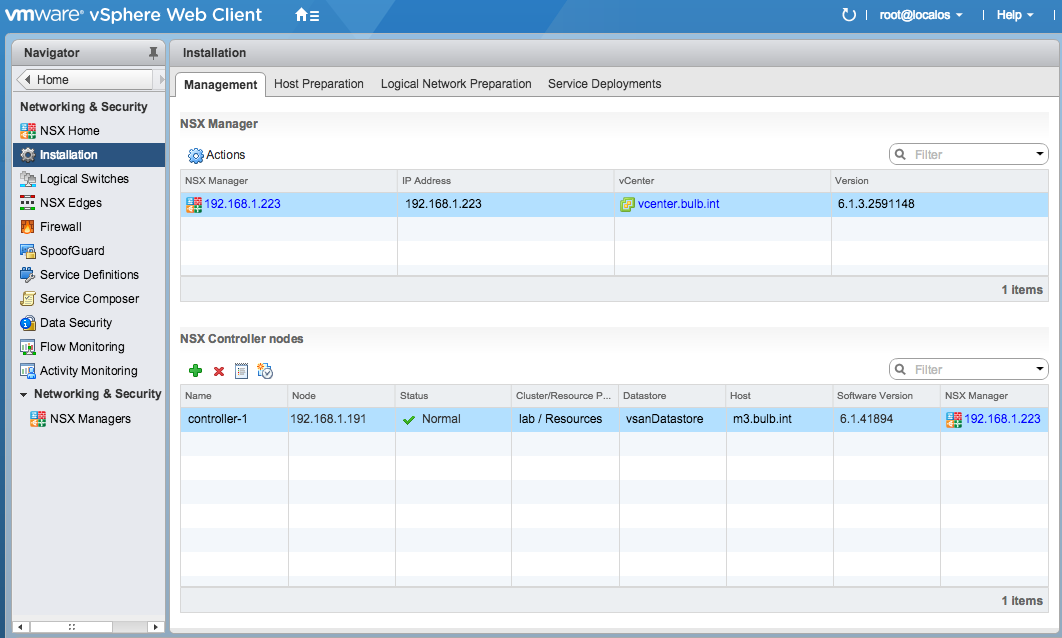
You can check that NSX is still operating normally.
My Bulb lab is now running vSphere 6.0, NSX 6.1.3 and VIO 1.0.
I wish you good luck if you decide to follow that path, I can already tell you it will pay back ;)
Links
- Official NSX Installation and Upgrade Guide documentation
- William Lam excellent serie of articles
- vCSA 6.0 tips & tricks